

Sale
Sold out

Seeds
Fabaceae
Aimers
Shelling Pea 'Laxton's Progress' Seeds — Organic
Pisum sativum
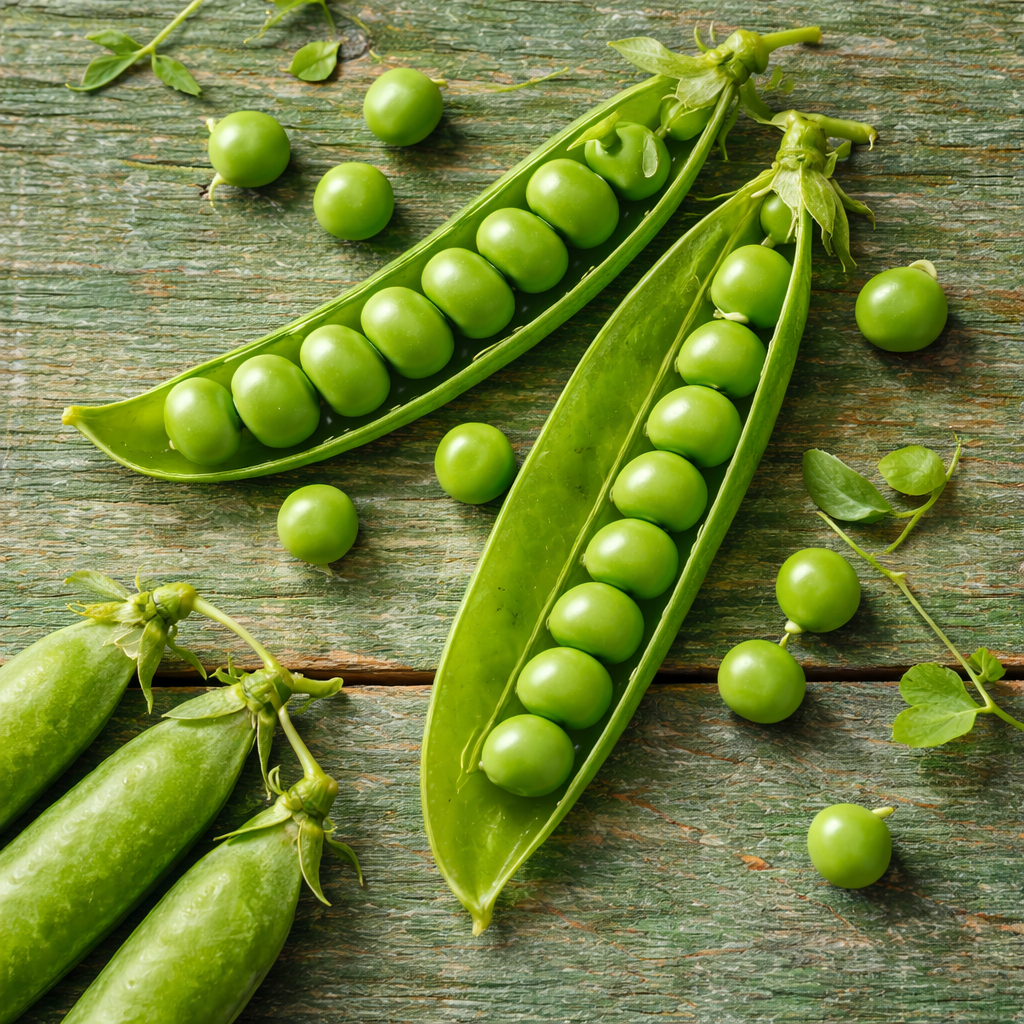
This shelling pea produces pods about 12.5 cm long containing eight to ten sweet, tender-skinned peas, according to the supplier. Harvest developed seeds before they harden. It prefers cool weather and is sown directly in loose, well-drained soil with a regular moisture supply. Peas bring a tender harvest to spring and early-summer meals. Depending on the type, you use shelled seeds or young whole pods. This distinction guides both picking time and preparation. Rinse the harvest and remove damaged parts. Brief cooking suits side dishes and stir-fries. To make use of a surplus later, prepare portions and follow a suitable blanching method before freezing. Match the amount you cook to the meal so the tender harvest does not wait unnecessarily. These Aimers organic seeds let you start the crop from an identified seed packet.
Sold as
Discover the plant
Common nameShelling pea
FamilyFabaceae
GenusPisum
Speciessativum
CultivarLaxton's Progress
TypeSeeds
Botanical namePisum sativum
Shelling Pea 'Laxton's Progress' Seeds — Organic This plant belongs to Pisum sativum. This shelling pea produces pods about 12.5 cm long containing eight to ten sweet, tender-skinned peas, according to the supplier. Harvest developed seeds before they harden. It prefers cool weather and is sown directly in loose, well-drained soil with a regular moisture supply. The pods supply shelling peas for side dishes and spring meals. These Aimers organic seeds let you start the crop from an identified seed packet. Keep the seed packet and plant label so you can refer to this variety’s growing directions throughout the season.
Sow pea seeds directly in workable soil in spring. This crop prefers cool weather; the supplier gives a soil temperature of 10 to 16 °C for sowing. Place seeds 1.25 to 2.5 cm deep in loose, well-drained soil. Keep moisture steady during germination. In a sufficiently long growing season, another sowing may be possible, taking account of the time remaining before frost. For double rows, leave about 25 cm between the two lines and 6.5 cm between seeds. The supplier recommends 75 cm between sets of double rows. Adapt the start to your Quebec region and the weather, keeping plants within reach for regular care.
Harvest peas at the stage suited to their pod type. Shelling peas are picked when seeds are formed but still tender; snow peas are harvested young before pods become noticeably swollen. Hold the stem with one hand and detach the pod with the other to avoid breaking the plant. Regular checks help you find hidden pods. Peas bring a tender harvest to spring and early-summer meals. Depending on the type, you use shelled seeds or young whole pods. This distinction guides both picking time and preparation. Rinse the harvest and remove damaged parts. Brief cooking suits side dishes and stir-fries.
In the garden
- Exposure
- Full sun
- Life cycle
- Annual
Sowing guide
Sowing & germination
Sowing depth
1.25 to 2.5 cm
Spacing / density
6.5 cm between seeds; 25 cm between paired rows; 75 cm between row pairs
Germination temperature
Soil at 10 to 16 °C
Sowing period
Spring, as soon as the soil is workable
Propagation
Sowing seed
Growing method
To grow Laxton's Progress, plan the start and the space for mature plants before sowing. Sow pea seeds directly in workable soil in spring. This crop prefers cool weather; the supplier gives a soil temperature of 10 to 16 °C for sowing. Place seeds 1.25 to 2.5 cm deep in loose, well-drained soil. Keep moisture steady during germination. In a sufficiently long growing season, another sowing may be possible, taking account of the time remaining before frost. Plan later sowings according to your local season rather than a universal date. For double rows, leave about 25 cm between the two lines and 6.5 cm between seeds. The supplier recommends 75 cm between sets of double rows. Put supports in place before stems lengthen, especially for taller types. Leave a path where you can move without pulling on tendrils. Reasonable spacing makes pods easier to see and pick at the right stage, whether they are beneath the leaves or along the edge of the planting. Prepare loose, well-drained soil enriched with mature compost. Avoid working waterlogged ground because it compacts easily. Remove weeds before sowing and keep the growing area accessible without walking on it. A soil test helps you decide which amendments are useful; do not add lime or fertilizer simply because a general recipe suggests it.
Soil and care
Soil & care
Soil pH
6.0 to 7.0
Care level
Moderate
Watering
Keep soil evenly moist during germination, then pay closer attention as plants flower and form pods. Water at the base without saturating the ground. Compact soil that stays waterlogged interferes with a good start. Weed carefully around seedlings so you do not disturb their roots. In containers, check moisture more often because the growing mix can dry quickly even during relatively cool weather. Adjust watering to the soil’s condition and the plants’ stage of growth.
Soil type
Prepare loose, well-drained soil enriched with mature compost. Avoid working waterlogged ground because it compacts easily. Remove weeds before sowing and keep the growing area accessible without walking on it. A soil test helps you decide which amendments are useful; do not add lime or fertilizer simply because a general recipe suggests it. Soil structure and drainage deserve as much attention as fertility. In containers, use an appropriate growing mix rather than compacted garden soil.
Fertilization
Adjust fertilization to the soil’s condition and the crop’s development. Mature compost contributes to garden preparation, but an additional application should not be automatic. Use a fertilizer intended for vegetables and follow its label. In containers, follow the growing mix’s recommendations and monitor plant growth. Increasing the dose does not correct cold conditions, insufficient light or excessive water. Check those growing conditions before deciding that a slow-growing plant needs more nutrients.
Seasonal care
Care for Laxton's Progress begins with establishment and continues through the last harvest. Keep soil evenly moist during germination, then pay closer attention as plants flower and form pods. Water at the base without saturating the ground. Compact soil that stays waterlogged interferes with a good start. Weed carefully around seedlings so you do not disturb their roots. In containers, check moisture more often because the growing mix can dry quickly even during relatively cool weather. Adjust watering to the soil’s condition and the plants’ stage of growth. Inspect plants regularly, including the undersides of leaves and the area near the crown. Identify symptoms and insects before intervening; their presence alone does not justify treatment. Keep tools clean and remove heavily damaged parts when appropriate for the crop. Avoid actions that injure roots or break stems. Good air circulation, careful watering and an accessible row make monitoring easier throughout the season. Use your observations to decide what action is needed rather than treating every mark in the same way. Harvest peas at the stage suited to their pod type. Shelling peas are picked when seeds are formed but still tender; snow peas are harvested young before pods become noticeably swollen. Hold the stem with one hand and detach the pod with the other to avoid breaking the plant. Regular checks help you find hidden pods. Use the harvest promptly, or prepare it for freezing after appropriate blanching. Keep the two pea types distinct when deciding what to pick. At the end of the season, monitor cold nights and finish harvesting according to the plants’ condition. Remove diseased residues and clean tools.
Container growing
Container growing
Plan container growing for Laxton's Progress according to the plant’s development and the space available. Peas can grow in containers if their roots have enough space and the growing mix stays evenly moist. Use a container with drainage holes and install its support before sowing, without blocking a walkway. Choose a sunny location where you can reach the pods. A balcony exposed to strong heat needs closer monitoring because peas prefer cool weather. Do not try to extend an exhausted crop simply by adding fertilizer. Assess the plant’s condition and the remaining growing season. Keep soil evenly moist during germination, then pay closer attention as plants flower and form pods. Water at the base without saturating the ground. Compact soil that stays waterlogged interferes with a good start. Weed carefully around seedlings so you do not disturb their roots. In containers, check moisture more often because the growing mix can dry quickly even during relatively cool weather. Adjust watering to the soil’s condition and the plants’ stage of growth. Adjust fertilization to the soil’s condition and the crop’s development. Mature compost contributes to garden preparation, but an additional application should not be automatic. Use a fertilizer intended for vegetables and follow its label. In containers, follow the growing mix’s recommendations and monitor plant growth.

Bloom and dimensions
Size, flowering & harvest
Growth habit
Bushy
Days to maturity
Approximately 65 days depending on the conditions
Harvest
Depends on sowing, weather and the harvest stage
Garden associations
Companion plants & uses
Companion plants
Plan neighbouring crops around their actual needs: light, water, space and harvesting access. Position tall crops where they will cast the least shade on nearby vegetables. Leave paths and avoid combining demanding plants in a small volume of soil. Nearby flowers can add diversity, but their presence does not guarantee protection from pests or a better harvest. Observe the plants, use a reasonable crop rotation and adjust combinations to their growth rather than relying on a list of supposed friends and enemies. Consider the full size of each crop when laying out a bed.
Garden use
Shelled peas for side dishes. Peas bring a tender harvest to spring and early-summer meals. Depending on the type, you use shelled seeds or young whole pods. This distinction guides both picking time and preparation. Rinse the harvest and remove damaged parts. Brief cooking suits side dishes and stir-fries. To make use of a surplus later, prepare portions and follow a suitable blanching method before freezing. Match the amount you cook to the meal so the tender harvest does not wait unnecessarily. Harvest peas at the stage suited to their pod type.
Recipe idea
From garden to table
Edible parts
Tender shelled peas
Prepare the Laxton's Progress harvest according to its tenderness and your intended use. To serve shelling peas, open the pods and collect the tender seeds, then steam them briefly. Add a little butter or oil and season to taste. Snow peas are prepared as young whole pods instead: rinse them, trim the ends if needed and quickly stir-fry with other vegetables. Avoid lengthy cooking if you want to keep some crunch. Shelled peas can also go into rice, soup or salad after cooking. Refrigerate leftovers promptly and prepare portions according to the fresh harvest rather than letting pods age in the garden. Check tenderness before deciding how to cook the crop. Label harvested or frozen portions so you can distinguish shelled peas from snow pea pods. This makes it easier to choose a preparation and avoids lengthy cooking of pods intended to remain crisp. Prepare small fresh portions when plants yield over several days. Wash the harvest before use and remove damaged or hardened parts that no longer offer the tenderness you want.
Frequently asked questions
Frequently asked questions
When should I sow Laxton's Progress seeds in Quebec?
Sow pea seeds directly in workable soil in spring. This crop prefers cool weather; the supplier gives a soil temperature of 10 to 16 °C for sowing. Place seeds 1.25 to 2.5 cm deep in loose, well-drained soil. Keep moisture steady during germination. In a sufficiently long growing season, another sowing may be possible, taking account of the time remaining before frost. Plan later sowings according to your local season rather than a universal date. In Quebec and across Canada, seasonal conditions vary among regions, urban gardens, exposed sites and sheltered locations. Check the forecast and the actual soil condition before planting. The same variety may develop at different rates in different gardens.
Can I grow Laxton's Progress in a container?
Peas can grow in containers if their roots have enough space and the growing mix stays evenly moist. Use a container with drainage holes and install its support before sowing, without blocking a walkway. Choose a sunny location where you can reach the pods. A balcony exposed to strong heat needs closer monitoring because peas prefer cool weather. Do not try to extend an exhausted crop simply by adding fertilizer. Assess the plant’s condition and the remaining growing season. Keep soil evenly moist during germination, then pay closer attention as plants flower and form pods. Water at the base without saturating the ground. Compact soil that stays waterlogged interferes with a good start. Weed carefully around seedlings so you do not disturb their roots.
How should I water Laxton's Progress in the garden?
Keep soil evenly moist during germination, then pay closer attention as plants flower and form pods. Water at the base without saturating the ground. Compact soil that stays waterlogged interferes with a good start. Weed carefully around seedlings so you do not disturb their roots. In containers, check moisture more often because the growing mix can dry quickly even during relatively cool weather. Adjust watering to the soil’s condition and the plants’ stage of growth. Prepare loose, well-drained soil enriched with mature compost. Avoid working waterlogged ground because it compacts easily. Remove weeds before sowing and keep the growing area accessible without walking on it.
When should I harvest Laxton's Progress?
Harvest peas at the stage suited to their pod type. Shelling peas are picked when seeds are formed but still tender; snow peas are harvested young before pods become noticeably swollen. Hold the stem with one hand and detach the pod with the other to avoid breaking the plant. Regular checks help you find hidden pods. Use the harvest promptly, or prepare it for freezing after appropriate blanching. Keep the two pea types distinct when deciding what to pick. Peas bring a tender harvest to spring and early-summer meals. Depending on the type, you use shelled seeds or young whole pods. This distinction guides both picking time and preparation. Rinse the harvest and remove damaged parts. Brief cooking suits side dishes and stir-fries.
How can I use the Laxton's Progress harvest in cooking?
Peas bring a tender harvest to spring and early-summer meals. Depending on the type, you use shelled seeds or young whole pods. This distinction guides both picking time and preparation. Rinse the harvest and remove damaged parts. Brief cooking suits side dishes and stir-fries. To make use of a surplus later, prepare portions and follow a suitable blanching method before freezing. Match the amount you cook to the meal so the tender harvest does not wait unnecessarily. To serve shelling peas, open the pods and collect the tender seeds, then steam them briefly. Add a little butter or oil and season to taste. Snow peas are prepared as young whole pods instead: rinse them, trim the ends if needed and quickly stir-fry with other vegetables. Avoid lengthy cooking if you want to keep some crunch.