Sale
Sold out

Compact root vegetable
Apiaceae
Organic root vegetable seeds
Organic 'Little Finger' carrot
Daucus carota subsp. sativus
Product code : BIOVO-0018
Organic 'Little Finger' is a compact carrot producing small orange roots that are short, cylindrical, and generally rounded at the tip. Flesh remains crisp and mild when soil stays moist and roots are harvested young. It particularly suits small gardens, raised beds, and containers at least 25 to 30 cm (10 to 12 in) deep. Always direct-sow in light, loose, stone-free soil, then keep the surface moist during germination that may require up to three weeks. Thin to 5 or 8 cm (2 to 3 in) and harvest around 60 days according to size and conditions. Successive sowings spread snacks, salads, roasted carrots, and small family harvests through the season. The compact roots are easy to size by checking their visible shoulders before harvest.
- Exposure
- Sun
- Life cycle
- Biennial grown as an annual crop
Discover the plant
Common name'Little Finger' carrot
FamilyApiaceae
GenusDaucus
Speciescarota subsp. sativus
CultivarLittle Finger
TypeCompact root vegetable
Botanical nameDaucus carota subsp. sativus
Reproducible seedsYes
Heirloom varietyYes
Organic 'Little Finger' carrot (Daucus carota subsp. sativus) is a short orange carrot grown for small, tender roots rather than oversized specimens. Its cylindrical shape and rounded tip make a useful harvest for whole-carrot side dishes, snack plates and compact kitchen gardens. A sufficiently deep container can work where in-ground soil is stony, provided the root zone remains evenly moist. The approximate 60-day maturity reference is a starting point for inspection, not an obligation to leave every root until the same date. Lift a sample and judge crispness and size. Several small sowings can provide a more manageable supply than one large row ready together.
Give carrot seed its final growing position from the beginning; transplanting can disrupt the taproot. Rake the surface fine, remove stones and sow shallowly, approximately 6–12 mm deep. Keep that upper layer moist while emergence is taking place, because a dry crust can prevent a promising row from establishing. Thin seedlings gently to about 5–8 cm apart once they can be handled. Remove weeds while they are small, working close to the surface so developing carrots are not disturbed. Water according to rainfall and soil moisture rather than allowing repeated cycles of severe drying followed by saturation.
Little Finger is ready whenever a sample root meets the size wanted for the kitchen. Loosen the soil with a fork set away from the row, then lift without pulling against dry, compacted ground. Remove leafy tops promptly to reduce moisture loss and keep the roots cool after picking. Small carrots can be steamed whole, roasted with herbs or served raw once washed. Blanch according to a tested method if freezing the harvest. Cover shoulders exposed by rain, and inspect stored roots periodically. Keep only sound carrots for storage, using damaged ones promptly if the remaining tissue is healthy.

Sowing guide
It all startswith a seed.
Sowing depth
Approximately 6 to 12 mm (1/4 to 1/2 in)
Spacing / density
Thin to approximately 5 to 8 cm (2 to 3 in)
Germination temperature
Approximately 10 to 24 °C (50 to 75 °F)
Germination time
Approximately 10 to 21 days in evenly moist soil; warmer soil within the crop’s suitable range speeds emergence.
Sowing period
Spring as soon as soil can be worked, then successive sowings through late summer according to the local season
Propagation
Direct sowing only for regular root production
Growing method
Growing carrot seeds: 'Little Finger' carrot. Direct-sow as soon as soil can be worked. Direct-sow these organic carrot seeds of 'Little Finger'; a cultivated carrot forms its best root when the seedling is not transplanted. If a seed harvest from 'Little Finger' is planned, retain the cultivar label and consult crop-specific isolation guidance; vegetable harvest directions alone are not sufficient. Water the full root depth as the surface begins drying, avoiding cycles of drought and saturation. The crop needs sun; nearby walls or taller crops should not compromise it. Thin in stages with scissors so the remaining seedlings keep undisturbed root space. At final planting, space this carrot thin to approximately 5 to 8 cm (2 to 3 in); crowding extra plants reduces access. Direct-sow the root crop; transplanting can bend or fork the developing taproot. Plan around the way the row grows: rosette of finely divided leaves above a short root. Keep access to the root zone for watering and inspection. Inspect the foliage and root shoulders without disturbing neighbouring plants. As the crop matures, use the expected harvest form—short cylindrical root with a generally rounded tip—to guide support, inspection, and careful picking. Avoid repeated nitrogen feeding, which can favour tops instead of a smooth root. Check root shoulders before lifting the row, and loosen the soil beside mature roots rather than pulling against resistance. Begin sampling this carrot when shoulders reach the diameter you want. Loosen the soil beside each developing root before lifting, trim tops promptly, cool roots in shade, and record which sowing date produced the best shape and tenderness.
Soil and care
The right care,at the right time.
Soil pH
Approximately 6.0 to 7.0
Minimum temperature
Approximately -3°C (27°F) for established plants; protect young seedlings from a hard freeze
Care level
Easy
Watering
Keep the surface consistently moist during germination, which may take up to three weeks. Use a fine watering rose so seed is not displaced. After emergence, provide approximately 2.5 cm (1 in) of water weekly, including rainfall, watering deeply when the surface dries. Even moisture supports tender, uniform roots. Alternating drought and excess water can cause bitterness, cracking, or misshapen growth. Check containers more often in hot weather and always let excess water drain away.
Soil type
'Little Finger' needs a deep, finely prepared root zone so its short cylindrical root with arounded tip can extend without obstruction. Rotate away from related crops where soil-borne problems have occurred. In the 'Little Finger' planting, loose sandy loam or a raised bed should hold steady moisture while draining promptly. For 'Little Finger' carrot, remove stones and hard clods, prevent surface crusting, and use only mature compost; fresh manure can promote distorted roots. Containers for 'Little Finger' need fine vegetable mix, uninterrupted root depth, and open drainage holes. Prepare the bed before sowing or transplanting rather than disturbing established roots.
Fertilization
Incorporate a moderate amount of mature compost before sowing. Normally fertile soil then needs little additional fertilizer. When a soil test shows a need, choose a balanced low-nitrogen formula and apply it lightly after thinning. Excess nitrogen favours foliage instead of roots, while fresh manure can cause forking. Never apply concentrated fertilizer to dry soil. Correct watering, drainage, crowding, and compaction first when growth slows, because these conditions often limit root development more than nutrients do.
Moisture
Evenly moist soil without saturation
Seasonal care
Seasonal care for 'Little Finger' carrot. Start 'Little Finger' carrot when its bed and the local frost pattern are ready; the supplied window is spring as soon as soil can be worked, then successive sowings through late summer according to the local season. Label the tray or row after sowing approximately 6 to 12 mm deep; seed generally emerges in 10 to 21 days at approximately 10 to 24 °C (50 to 75 °F), and slower seeds should not be disturbed. Direct-sow into deep, loose, stone-free soil; transplanting or hard clods can distort the short cylindrical root with a generally rounded tip. Prevent a crust from forming, then shift from light germination watering to deeper irrigation as roots lengthen. Thin seedlings early to the stated spacing by cutting extras rather than tugging against neighbouring roots, and keep the shoulders lightly covered. Maintain even moisture without saturation; long dry spells followed by heavy watering can produce cracking, coarse texture, or irregular growth. For container-grown 'Little Finger' carrot, use the supplied guidance—25 to 30 cm (10 to 12 in)—and check drainage before growth hides the surface. Carrot rust fly and exposed green shoulders deserve regular checks as the crop develops. Treat the supplied harvest guidance—around 60 days or whenever shoulders reach the desired diameter—as a starting point, then lift one sample to assess diameter, colour, and tenderness before clearing the row. For succession, make smaller sowings while enough cool-season time remains before local heat or hard freezing. At harvest, loosen the surrounding soil, trim foliage as appropriate, cool the crop promptly, and discard roots showing rot or serious damage.
Container growing
A garden,within reach.
Recommended pot size
25 to 30 cm (10 to 12 in)
Growing 'Little Finger' carrot in containers. For 'Little Finger', choose a container matching this guide: 25 to 30 cm (10 to 12 in). Keep several drainage holes unobstructed. Direct-sow 'Little Finger' rather than transplanting, then label the container and keep the surface evenly moist. This carrot produces the expected harvest form: short cylindrical root with a generally rounded tip. Protect the developing crop from soil splash and rough handling. Place the pot in sun or bright partial shade where heavy rain cannot leave it standing in water. The crop has a habit described as rosette of finely divided leaves above a short root; use this to guide positioning or selective thinning without forcing a cramped plant. Thin seedlings with scissors to protect the roots that remain. Choose a position for the row with sun without sacrificing airflow or watering access. Add a fine mulch only after establishment and keep crowns or shoulders uncovered as appropriate. Keep thin to approximately 5 to 8 cm (2 to 3 in) around the root crop, especially where neighbouring foliage could shade or trap moisture. For this carrot, keep foliage open to light, remove weeds shallowly, and cover exposed root shoulders with a little clean mix when needed. Sample one root first, loosen the surrounding mix, and lift the remainder without scraping neighbouring roots. Sample the crop before lifting the whole container. Loosen mix beside the developing roots, harvest without twisting neighbouring roots, trim tops promptly, and refrigerate sound roots separately from foliage.

Bloom and dimensions
Its place,in your garden.
Mature height
Foliage approximately 15 to 30 cm (6 to 12 in), depending on growing conditions
Width / spread
Approximately 10 to 20 cm (4 to 8 in)
Flower color
White
Foliage color
Medium green
Foliage type
Deciduous
Growth rate
Fast
Growth habit
Rosette of finely divided leaves above a short root
Fragrance
Subtle fragrance
Bloom period
Carrot is biennial: it normally forms its storage root in the first year and flowers after a cold period during the second season. For eating, harvest roots before a flower stalk appears because bolting makes them more fibrous. Second-year white umbels attract many insects. When saving seed, isolate plants from other flowering carrots and wild carrot because crossing can alter later generations. Only healthy, correctly shaped roots should be selected for overwintering and seed production.
Fruiting
Little Finger is grown for a compact first-year root, not for fruit. A sound root retained through winter may flower in year two, producing umbels followed by dry carrot seed. Bolting makes the root fibrous and ends its culinary value. Choose either harvest or seed production, and isolate labelled seed plants from other carrots because pollen movement can change the next generation.
Days to maturity
Approximately 60 days from direct sowing, depending on growing conditions
Harvest
Around 60 days or whenever shoulders reach the desired diameter

Garden associations
In goodcompany.
Companion plants
Low lettuce, green onions, or quick radishes may share the edges of a 'Little Finger' row if they are removed before roots compete. Keep neighbouring roots outside the loose column needed by the short cylindrical root with arounded tip. Rotation, shallow weeding, and inspection remain more dependable for 'Little Finger' carrot than any claim that one neighbour repels carrot pests. Remove any neighbour that begins competing for light, moisture, airflow, or harvest access. In the 'Little Finger' planting, leave enough room to loosen and lift the short cylindrical root with arounded tip without uprooting the companion crop. Use companion planting to organize succession and diversity, not as a substitute for sound crop care. Reassess the arrangement around 'Little Finger' as both crops approach mature size.
Recipe idea
From the gardento your plate.
Edible parts
Roots; young tops only when clean and correctly identified
'Little Finger' carrot in the kitchen. Glazed 'Little Finger' carrots — Leave small, evenly sized roots whole after scrubbing, trimming the tops to a short stem if desired. Melt 15 mL butter in a sauté pan and roll 450 g carrots in it for two minutes. Add 100 mL water and a pinch of salt, cover, and cook gently for six to ten minutes. Uncover when the carrots are almost tender, then stir in 10 mL honey and 5 mL lemon juice. Continue turning them until the liquid lightly coats each root. Finish with chopped chives and black pepper. Serve the glossy carrots whole beside fish, tofu, or a spring grain salad; their narrow shape makes an attractive presentation without elaborate cutting. Check the largest root before removing the pan from the heat. Wash soil away before cooking and clean the sink afterward. If roots vary greatly in thickness, halve the widest ones so the thin carrots do not overcook. Transfer leftovers to a shallow covered container and refrigerate promptly rather than leaving the glazed vegetables on the table.
Frequently asked questions
Your questions,answered.
When and how should 'Little Finger' be sown?
Direct-sow as soon as soil can be worked, then repeat two or three times at approximately three-week intervals. Do not transplant carrots because their taproot distorts easily. Prepare light, stone-free soil and place seed 6 to 12 mm (1/4 to 1/2 in) deep. Keep the surface moist for 10 to 21 days and prevent crusting after rain. When seedlings measure 8 to 10 cm (3 to 4 in), thin gradually to 5 or 8 cm (2 to 3 in). Label the row because slow emergence allows weeds to become difficult to distinguish. Use a gentle spray so tiny seed and seedlings are not washed out of position.
Why do carrots become forked or fibrous?
Forked roots often result from compact stony soil, transplanting, fresh manure, or injury early in growth. Loosen soil deeply, remove stones, and direct-sow. Fibrous, bitter, or tough texture is often worsened by insufficient water or late harvest. Provide approximately 2.5 cm (1 in) of water weekly, including rainfall, and avoid extreme changes between drought and saturation. Thin on time to reduce competition. Harvest one test root when shoulders reach the desired size. Record observed defects to distinguish a soil problem from watering or timing. Cover green shoulders with a little soil, but never bury the leaf centre or compact the root zone.
Can 'Little Finger' be grown in a container?
Little Finger is a practical container carrot because its root stays short and cylindrical with a rounded tip. Use a pot 25 to 30 cm deep with unobstructed drainage and a fine, loose, stone-free mix. Direct-sow 6 to 12 mm (¼ to ½ in) deep; do not transplant the seedlings. Maintain gentle, even surface moisture while germination proceeds, usually 10 to 21 days. Thin plants to approximately 5 to 8 cm apart so each root can size without competition. Water consistently, avoiding both a dry crust and saturation. Cover any exposed shoulders lightly with mix. Begin checking around 60 days from direct sowing, then harvest when the shoulders reach the diameter and tenderness you prefer. The compact root fits the pot, but shallow soil or crowding will still limit its form.
When should 'Little Finger' carrots be harvested?
Begin checking Little Finger carrots around 60 days after direct sowing. Brush soil gently from the shoulder and assess diameter; the root is naturally short and cylindrical with a rounded tip, so do not wait for it to become a long storage carrot. Lift one sample from moist, loose soil and test its tenderness before harvesting the rest. Loosen the mix beside the root if it resists rather than pulling hard on the leaves. Leave smaller carrots to continue growing. Remove tops promptly from roots intended for refrigeration, and keep clean, correctly identified young foliage separate if it will be used. The day count is approximate and growing conditions matter. Record the sample date and shoulder size so later sowings can be harvested according to your preferred texture.
Will harvested seed remain true to 'Little Finger'?
Little Finger seed is not guaranteed true merely because it came from a Little Finger root. Carrots are biennial and flower in their second year; insects can cross-pollinate them with other carrot cultivars or compatible wild relatives. To preserve the short cylindrical root and rounded tip, select several healthy, true-to-type roots, keep them labelled, and isolate their flowering umbels from unwanted pollen. Collect only mature, dry seed from sound plants and store it separately with the year. Seed produced without known isolation should be considered experimental because offspring may vary in root form and quality. Sow a trial row and compare it with the cultivar description before using the saved lot for the main planting. First-year roots harvested for eating will not have produced seed.
Wildlife and pets
Life,around your plants.
Supporting wildlife
Little Finger does not need pollination to make its compact edible root. White umbels appear only if a root is overwintered and allowed to flower in year two, when small bees, flies, and beetles may visit. Because normal crops are harvested near 60 days, this wildlife value is usually absent. Nearby annual flowers provide a more immediate resource.
For a great start to your seeds
The right extras.Right here.
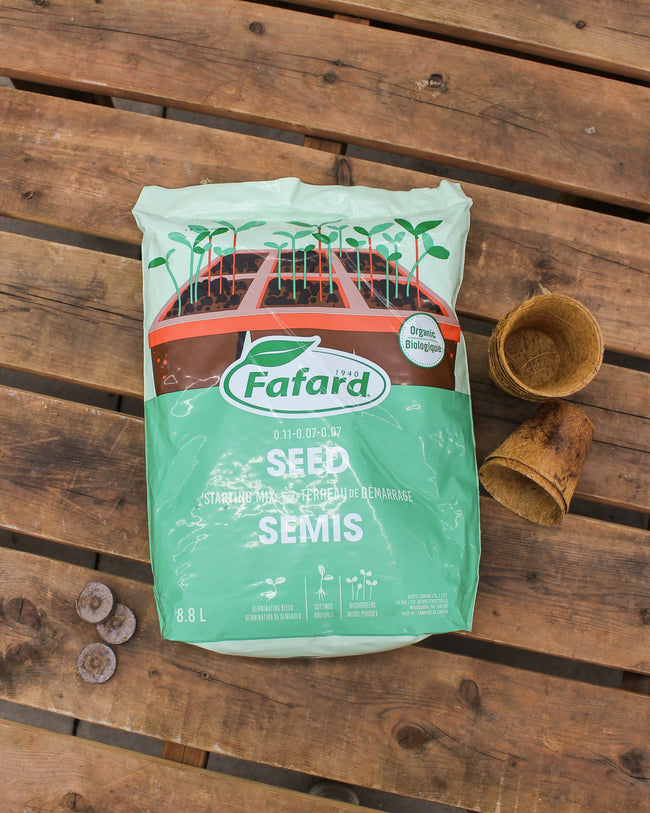
Seed Starting Soil
Shop the collectionSeed starting supplies
Shop the collection