Les jardins de l'écoumène

Papaver pilosum

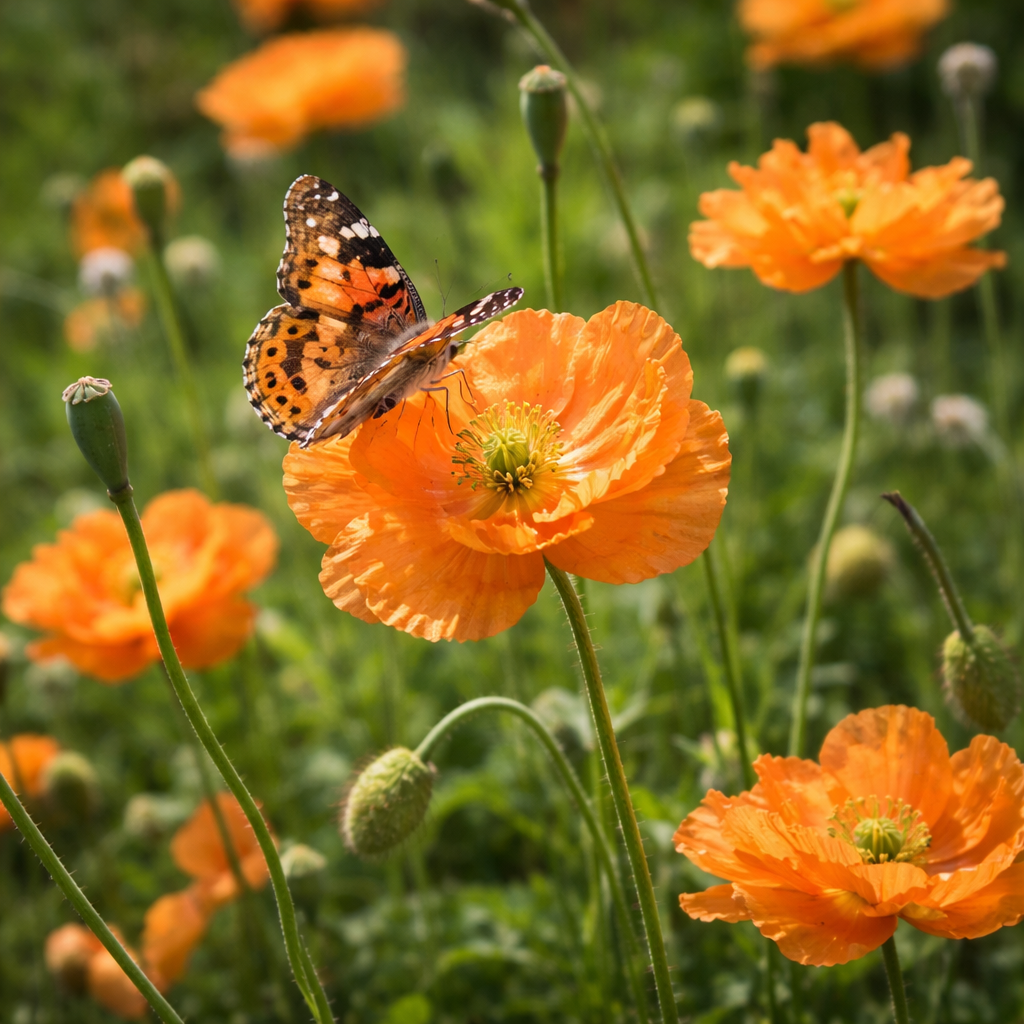
The Turkish poppy bears orange flowers with delicate petals, above a velvety foliage. This perennial is suitable for well drained rock gardens and well-drained beds. Cultivate this Papaver pilosum for its flowers and decorative capsules; its seeds are not presented as food poppy seeds. These organic seeds from Jardins de l’écoumène let you start your own plants and follow their development from sowing onward. Plan the arrangement around each plant’s mature habit and the distance from which the flowers will be viewed. Position smaller flowers close to a path for easy viewing, while taller plants can provide a focal point at the back of a bed.
Sold as 200 seeds
4 49 $

Sold out

Pay in 4 interest-free payments withSezzle

Delivery and pickup: view conditions

Product information
Québec product
Secure payment
Share

Discover the plant

Common nameTurkish poppy; hairy-stemmed poppy
FamilyPoppy family
GenusPoppy
Specieshairy
TypePerennial flower
Botanical namePapaver pilosum
Reproducible seedsYes

Papaver pilosum — Turkish Poppy. The Turkish poppy bears orange flowers with delicate petals, above a velvety foliage. This perennial is suitable for well drained rock gardens and well-drained beds. Cultivate this Papaver pilosum for its flowers and decorative capsules; its perennial flower seeds are not presented as food poppy seeds. These organic seeds from Jardins de l’écoumène let you start your own plants and follow their development from sowing onward. When planning the arrangement, consider the shape and spread of the mature plants as well as the distance from which you will usually view their flowers.

Recommended planting period: spring or autumn. Sow on the surface, without covering. Germination usually takes 7-10 days. For germination, keep the soil at 15 to 20°C (59 to 68°F). Transplant the young flowering plants once their true leaves have developed and their roots hold the root ball together. Handle the seedlings gently and avoid squeezing their delicate stems. Under grow lights, gradually space the containers farther apart so that the foliage does not overlap. Hardening off then prepares the plants for outdoor sunlight, wind and changes in temperature. Handle the roots carefully during this operation.

Plan the arrangement around each plant’s mature habit and the distance from which the flowers will be viewed. Position smaller flowers close to a path for easy viewing, while taller plants can provide a focal point at the back of a bed. Repeat groups of the same variety to create a clear, visible colour pattern. Leave room to reach the plants for cutting, and avoid crowding clumps simply to fill the space right away. Choose between prolonging flowering and keeping seeds on a few stems. Deadheading is suitable for many annuals, while developing seed heads and dried flower clusters can also provide ornamental interest.

In the garden

Exposure
Full sun
Life cycle
Perennial

Sowing guide

Sowing & germination

Sowing depth

Surface sow; do not cover

Spacing / density

30 cm (12 in.) between plants

Germination temperature

15 to 20°C (59 to 68°F)

Germination time

7-10 days

Sowing period

Spring or autumn

Propagation

From seed

Growing method

Recommended planting period: spring or autumn. Sow on the surface, without covering. Germination usually takes 7-10 days. For germination, keep the soil at 15 to 20°C (59 to 68°F). Transplant the young flowering plants once their true leaves have developed and their roots hold the root ball together. Handle the seedlings gently and avoid squeezing their delicate stems. Under grow lights, gradually space the containers farther apart so that the foliage does not overlap. Hardening off then prepares the plants for outdoor sunlight, wind and changes in temperature. Plant outdoors once the conditions are suitable for the plants’ cold tolerance. Watch the progression from flower buds to open blooms and faded flowers to decide which care the plant needs. A cut must preserve the shoots that will bloom afterwards. Check the supports on tall-stemmed plants after a period of strong wind. Lightly removing damaged growth helps maintain the plant’s shape without leaving it bare. Adapt the end of the season to the cycle of the plant: annuals and perennials do not require the same preparation for winter. Choose between prolonging flowering and keeping seeds on a few stems. Water gently to avoid moving the seeds.

Soil and care

Soil & care

Watering

Keep mild moisture during germination and establishment, without saturating the soil. When the plant is well rooted, let the soil surface dry between waterings and ensure excellent drainage. A recent rain can make additional input unnecessary. In a container, check the pot before adding water and empty the saucers. Avoid keeping the glue in wet soil, especially when temperatures drop or growth slows.

Soil type

Prepare a poor, dry and well drained soil. Transplant the young flowering plants once their true leaves have developed and their roots hold the root ball together. Handle the seedlings gently and avoid squeezing their delicate stems. Under grow lights, gradually space the containers farther apart so that the foliage does not overlap. Hardening off then prepares the plants for outdoor sunlight, wind and changes in temperature.

Fertilization

Fertilization supports growth and should take into account the nutrients already present in the soil or potting mix. Use mature compost or a fertilizer suitable for the crop, following the recommended application rate. Avoid combining too many products, especially in a container where the roots have a limited volume of growing medium. Water as needed after applying nutrients, and observe foliage growth before deciding whether another fertilizer application is necessary.

Moisture

Keep the growing mix moist during germination, without standing water; then adjust to the crop

Seasonal care

Transplant the young flowering plants once their true leaves have developed and their roots hold the root ball together. Handle the seedlings gently and avoid squeezing their delicate stems. Under grow lights, gradually space the containers farther apart so that the foliage does not overlap. Hardening off then prepares the plants for outdoor sunlight, wind and changes in temperature. Plant outdoors once the conditions are suitable for the plants’ cold tolerance. Watch the progression from flower buds to open blooms and faded flowers to decide which care the plant needs. A cut must preserve the shoots that will bloom afterwards. Check the supports on tall-stemmed plants after a period of strong wind. Lightly removing damaged growth helps maintain the plant’s shape without leaving it bare. Adapt the end of the season to the cycle of the plant: annuals and perennials do not require the same preparation for winter. Decide which stems to keep flowering and which to leave in place so that they can develop seeds. Deadheading is suitable for many annuals, while developing seed heads and dried flower clusters can also provide ornamental interest. Keep plants labelled after flowering ends, and remove self-sown seedlings that are growing in a path. The Turkish poppy bears orange flowers with delicate petals, above a velvety foliage. This perennial is suitable for well drained rock gardens and well-drained beds.

Container growing

Container growing

Recommended pot size

A stable container with drainage holes, enough width for the plant’s spread and sufficient depth for its roots
Choose a location in full sun. Reserve this spread around the plant: 30 to 40 cm (12 to 16 in.). A flowering container arrangement should leave enough room for every plant to grow. Place upright plants where they remain visible, and let any trailing stems extend over the container’s edge. Check that the combined plants share the desired exposure and moisture. After a few weeks, check where the plants are becoming crowded and remove only damaged parts or stems that disrupt the balance of the arrangement. The Turkish poppy bears orange flowers with delicate petals, above a velvety foliage. This perennial is suitable for well drained rock gardens and well-drained beds. Cultivate this Papaver pilosum for its flowers and decorative capsules; its seeds are not presented as food poppy seeds. Watch the progression from flower buds to open blooms and faded flowers to decide which care the plant needs. A cut must preserve the shoots that will bloom afterwards. After a period of strong wind, check that the supports around any tall-stemmed plants are still holding their stems securely. Lightly removing damaged growth helps maintain the plant’s shape without leaving it bare. Check drainage holes regularly.
Sachet de semences Pavot de Turquie. Emballage blanc photographié de face sur un fond de bois brun. Une image du végétal occupe la partie centrale, sous le nom imprimé. De petits pictogrammes et un code-barres apparaissent au bas du sachet. La marque Écoumène figure dans la partie supérieure de cette présentation.

Bloom and dimensions

Size, flowering & harvest

Mature height

40 to 60 cm (16 to 24 in)

Width / spread

30 to 40 cm (12 to 16 in)

Growth habit

Upright

Bloom period

Flowering usually occurs in this period: summer of the 2nd year. Decide which stems to keep flowering and which to leave in place so that they can develop seeds. Deadheading is suitable for many annuals, while developing seed heads and dried flower clusters can also provide ornamental interest. Keep plants labelled after flowering ends, and remove self-sown seedlings that are growing in a path.

Harvest

Decorative capsules after flowering
Pavot de Turquie. Fleurs de pavot orange, avec un papillon sur une fleur. Le cadrage permet de voir les formes, les couleurs et les détails du sujet représenté. Les contours se détachent du fond de l’image, avec des différences de teinte et de texture visibles sur les surfaces. Cette vue accompagne la présentation du produit dans la boutique.

Garden associations

Companion plants & uses

Companion plants

In a mixed planting, you can reserve sections close to these plants: yarrow, lavender, ornamental grasses. The association is used here to organize space and crops. Allow for the height, light requirements and water needs of each plant, leaving enough room between the foliage. Keep a path clear for watering and harvesting, then remove finished crops to make room for the next planting. This arrangement makes maintenance easier without promising protection against garden pests. Plan the arrangement around each plant’s mature habit and the distance from which the flowers will be viewed.

Garden use

Choose between prolonging flowering and keeping seeds on a few stems. Deadheading is suitable for many annuals, while developing seed heads and dried flower clusters can also provide ornamental interest. Keep plants labelled after flowering ends, and remove self-sown seedlings that are growing in a path. The Turkish poppy bears orange flowers with delicate petals, above a velvety foliage. This perennial is suitable for well drained rock gardens and well-drained beds. Cultivate this Papaver pilosum for its flowers and decorative capsules; its seeds are not presented as food poppy seeds.

Frequently asked questions

Frequently asked questions

How do I grow Turkish Poppy from seed?
Recommended planting period: spring or autumn. Sow on the surface, without covering. Germination usually takes 7-10 days. For germination, keep the soil at 15 to 20°C (59 to 68°F). Transplant the young flowering plants once their true leaves have developed and their roots hold the root ball together. Handle the seedlings gently and avoid squeezing their delicate stems. Under grow lights, gradually space the containers farther apart so that the foliage does not overlap. Hardening off then prepares the plants for outdoor sunlight, wind and changes in temperature. Plant outdoors once the conditions are suitable for the plants’ cold tolerance.
Can I grow Turkish Poppy in a container?
For this crop, choose a growing position that will receive full sun. Reserve this spread around the plant: 30 to 40 cm (12 to 16 in.). A flowering container arrangement should leave enough room for every plant to grow. Place upright plants where they remain visible, and let any trailing stems extend over the container’s edge. Check that the combined plants share the desired exposure and moisture. After a few weeks, check where the plants are becoming crowded and remove only damaged parts or stems that disrupt the balance of the arrangement. The Turkish poppy bears orange flowers with delicate petals, above a velvety foliage.
How do I care for Turkish Poppy during the season?
Choose between prolonging flowering and keeping seeds on a few stems. Deadheading is suitable for many annuals, while developing seed heads and dried flower clusters can also provide ornamental interest. Keep plants labelled after flowering ends, and remove self-sown seedlings that are growing in a path. Watch the progression from flower buds to open blooms and faded flowers to decide which care the plant needs. A cut must preserve the shoots that will bloom afterwards. Check the supports on tall-stemmed plants after a period of strong wind. Lightly removing damaged growth helps maintain the plant’s shape without leaving it bare.
What makes Turkish Poppy distinctive in the garden?
The Turkish poppy bears orange flowers with delicate petals, above a velvety foliage. This perennial is suitable for well drained rock gardens and well-drained beds. Cultivate this Papaver pilosum for its flowers and decorative capsules; its seeds are not presented as food poppy seeds. When planning the arrangement, consider the shape and spread of the mature plants as well as the distance from which you will usually view their flowers. Position smaller flowers close to a path for easy viewing, while taller plants can provide a focal point at the back of a bed. Repeat groups of the same variety to create a clear, visible colour pattern.
How do I arrange a planting of Turkish Poppy?
At planting, plan 30 cm (12 in.) between the plants. Plan the arrangement around each plant’s mature habit and the distance from which the flowers will be viewed. Position smaller flowers close to a path for easy viewing, while taller plants can provide a focal point at the back of a bed. Repeat groups of the same variety to create a clear, visible colour pattern. Leave room to reach the plants for cutting, and avoid crowding clumps simply to fill the space right away. Watch the progression from flower buds to open blooms and faded flowers to decide which care the plant needs. A cut must preserve the shoots that will bloom afterwards.

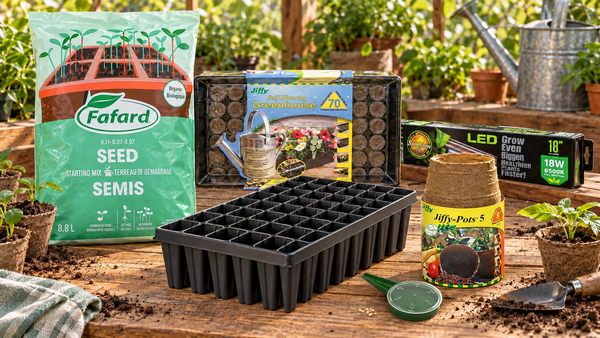
Seed-starting essentials

Click a product to build your selection.

Your selection

Total