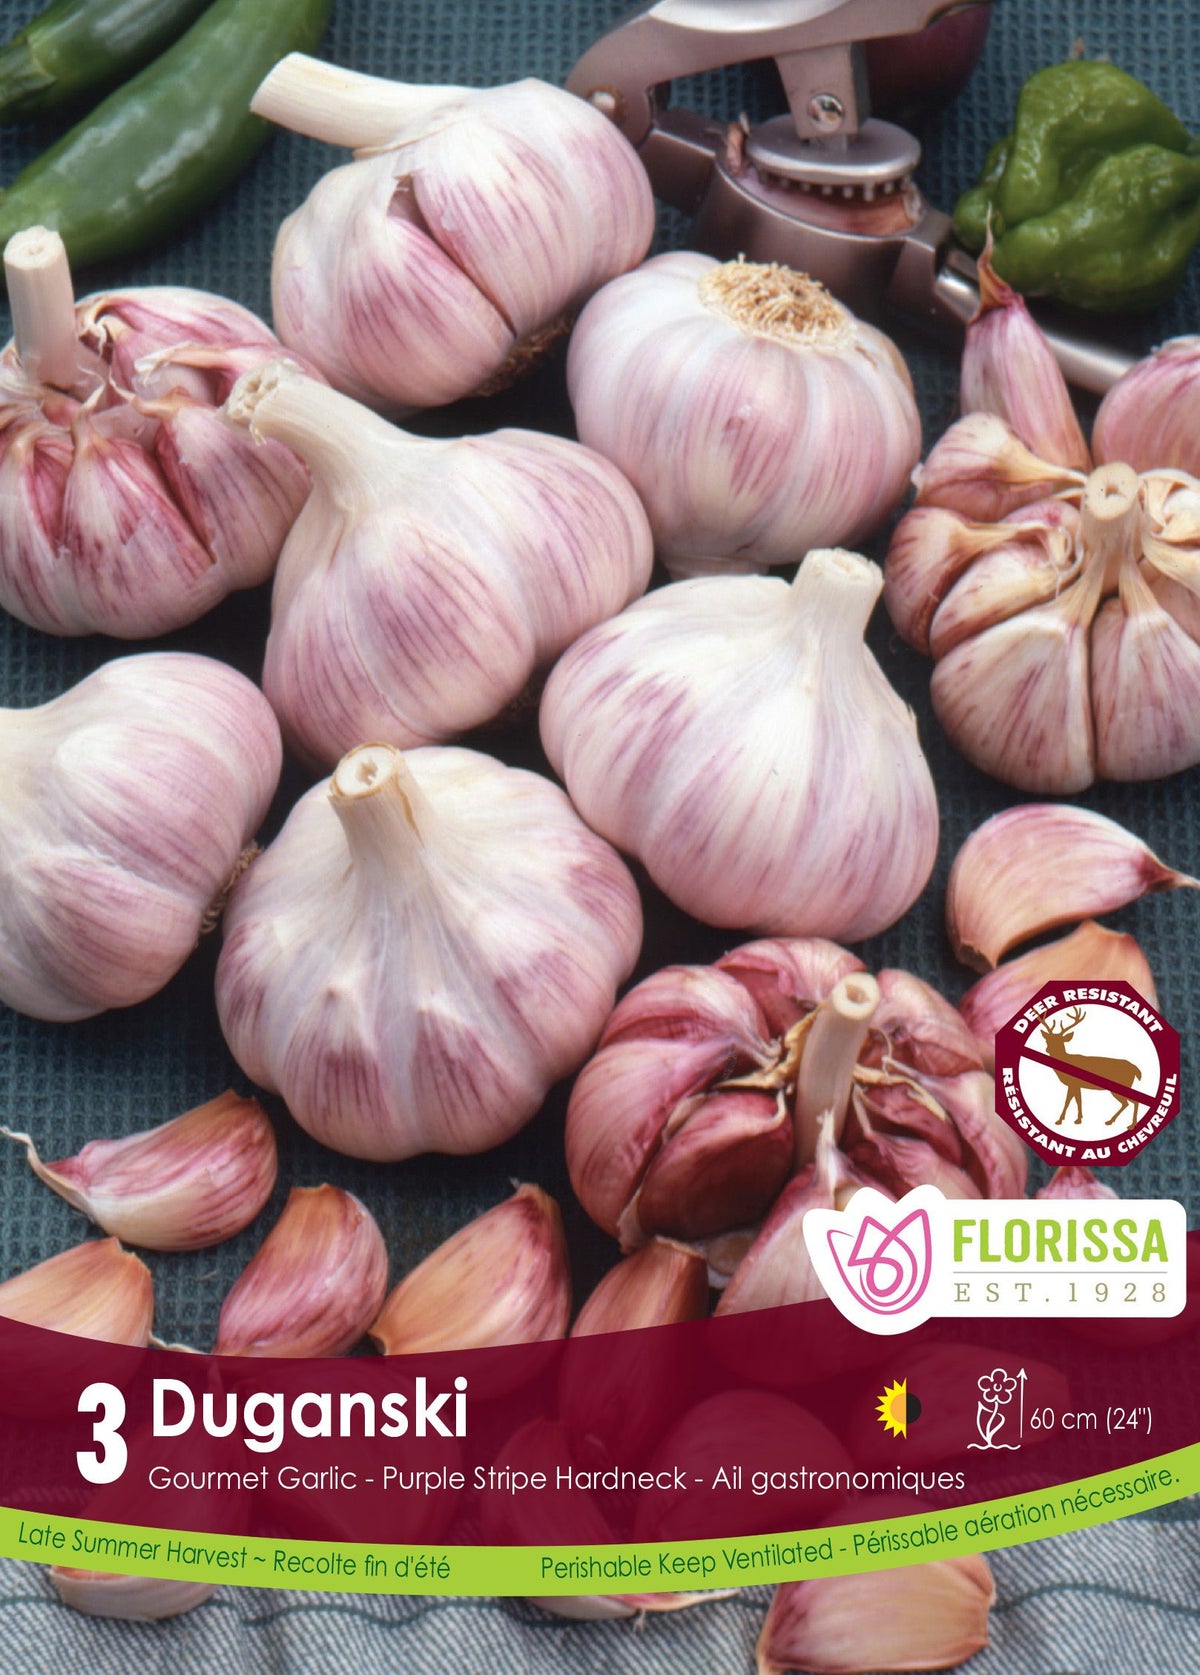
Hardy, colourful, intensely aromatic Purple Stripe garlic · garlic bulbs for planting

Duganski garlic (Allium sativum var. ophioscorodon ‘Duganski’)

Allium sativum var. ophioscorodon

Duganski is a Purple Stripe hardneck combining spectacular colour, northern hardiness, and intense flavour. The package contains exactly 3 bulbs, each generally carrying 7 to 10 large cloves beneath white wrappers streaked with violet. Planted in fall, it grows as an upright clump approximately 60 cm (24 in) tall and produces a strongly curling garlic scape in spring. Harvest arrives around midsummer. Raw cloves deliver fiery heat; roasted cloves become rich and slightly nutty. Careful curing supports storage into spring. This cultivar is ideal for growing garlic in Canada in fertile, draining soil protected with winter mulch. It rewards careful timing with colourful dependable heads.
2 49 $
Pay in 4 interest-free payments with Sezzle
Detailed plant guide
Advice adapted to Canada
Secure payment
2026 preorder for fall bulbs Shipping expected in October 2026.
Share
Quantity 3 bulbs
Exposure Full sun to bright partial shade
Hardiness Zones 2 to 10
Difficulty level Easy

Discover the plant

Family Amaryllidaceae
Genus Allium
Species sativum var. ophioscorodon
Cultivar Duganski
Type Standard Purple Stripe hardneck garlic bulbs for planting
Cycle Bulbous perennial grown as an annual vegetable crop

Duganski garlic (Allium sativum var. ophioscorodon ‘Duganski’) is a Standard Purple Stripe hardneck from Central Asia, distinguished by white wrappers broadly streaked with violet. Each head generally contains 7 to 10 large elongated cloves arranged around a rigid central stalk. Fiery flavour appears quickly when raw, then softens into deep, slightly nutty richness after cooking. The Van Noort package contains exactly 3 bulbs. Upright plants reach approximately 60 cm (24 in), produce a strongly curling spring scape, and suit Zones 2 through 10, performing especially well in cool climates with dependable winter cold.

To plant garlic in fall successfully, separate the 3 bulbs only at planting time and retain firm cloves. Choose full sun or bright partial shade with deep, fertile, loose, exceptionally well-drained soil. Position every point upward at 8 cm (3 in) deep and 15 cm (6 in) apart. Water once, then mulch after the ground cools. In spring, weed early, maintain even moisture, and feed moderately. Cut garlic scapes while they form their characteristic tight curl, before straightening, to support head size. Prevent standing water because saturated soil encourages bulb disease despite Duganski’s considerable cold hardiness.

Harvest in midsummer when lower leaves brown but four or five upper leaves remain green. Stop watering two weeks beforehand, lift with a fork, and cure whole plants for two to four weeks in shade with strong airflow. Duganski can store into spring under good conditions. Large cloves strengthen marinades, sauces, stews, and roasted vegetables; whole roasting reveals their nutty finish. Young scapes become pesto or a grilled vegetable. Keep garlic beyond pets’ reach and rotate the crop for four years to reduce Allium pests and diseases. Reserve only sound, well-cured cloves when saving planting stock.

Duganski garlic (<em>Allium sativum var. ophioscorodon</em> ‘Duganski’)

Planting guide

From planting to establishment.

Planting depth 8 cm (3 in), point upward
Spacing / density 15 cm (6 in) between plants and approximately 30 cm (12 in) between rows
Establishment temperature 10 to 15°C
Establishment time 14 to 28 days
Best planting time October to November in Quebec, depending on region
Propagation Separate bulbs into cloves immediately before planting
Growing method
In fall, choose a site in full sun or bright partial shade, never a wet hollow. Loosen soil to 20 to 25 cm (8 to 10 in), remove perennial weeds, and incorporate mature compost. Keep all 3 bulbs intact until planting day, then separate them without removing wrappers. Discard soft, spotted, or injured cloves. Position points upward at 8 cm (3 in) deep, space them 15 cm (6 in) apart, and leave approximately 30 cm (12 in) between rows. Water deeply once. After soil cools, spread 10 to 15 cm (4 to 6 in) of clean straw or shredded leaves. In spring, open mulch above shoots, weed early, and provide approximately 2.5 cm (1 in) of water weekly including rainfall. Feed as growth resumes, then stop high-nitrogen fertilizer when bulbs begin enlarging. Cut scapes after they nearly complete their curl. Stop watering two weeks before harvest. Lift heads with a fork without pulling, then cure whole plants for two to four weeks in shade with dry, moving air. Label the row clearly at planting and inspect several sample heads before lifting the entire crop, because seasonal weather can shift maturity by several days.

Soil and care

The right conditions.

Exposure Full sun to bright partial shade
Soil pH 6.2 to 6.8
Hardiness zone Zones 2 to 10
Minimum temperature Hardy to Zone 2 with well-drained soil and winter mulch
Watering
From spring through head enlargement, provide approximately 2.5 cm (1 in) of water weekly including rainfall. Water deeply and check beneath mulch first. Shallow roots suffer when soil dries, but saturated ground rots cloves. Reduce moisture as lower leaves brown and stop approximately two weeks before harvest to protect wrappers and storage quality.
Soil type
Duganski prefers deep, loose loam rich in stable organic matter that retains moisture without remaining saturated. Maintain pH 6.2 to 6.8 and incorporate mature compost rather than fresh manure. In clay, use a raised bed; in sand, increase compost. Avoid stones, compaction, and slow drainage, which reduce size or encourage bulb disease.
Fertilization
Prepare the bed with mature compost and base additions on a soil test when possible. In spring, apply moderate balanced or slightly nitrogen-forward fertilizer to support foliage, followed by a light side-dressing before enlargement if growth remains weak. Stop nitrogen afterward because it delays maturity. Avoid fresh manure and concentrated fertilizer directly on cloves.
Seasonal care
In fall, plant firm cloves in draining soil, water, and mulch only after the ground cools. During winter, replace windblown mulch and check after thaws that water never pools. In spring, uncover shoots gently, weed early, and resume deep irrigation. Feed as growth restarts, then again before enlargement only when growth requires it. Watch for thrips, Allium leaf miner, slugs, rust, downy mildew, and white rot. Remove severely affected tissue promptly and do not move potentially contaminated soil. Cut scapes once they nearly form a complete curl to improve head size. In summer, reduce water as lower leaves brown and stop two weeks before harvest. Lift without pulling foliage. Cure whole plants for two to four weeks under a shaded, dry, ventilated shelter, then trim roots and stems. Store in airy baskets and inspect regularly. Use any softening head promptly. The following fall, replant only healthy cloves in another plot and maintain four years without garlic, onions, shallots, or leeks in the same ground. Record planting, scape cutting, and harvest dates to adapt care to the garden microclimate. After every heavy rain, inspect containers and raised beds and correct slow drainage immediately so cloves never remain in saturated ground. Replace damaged labels before winter, photograph representative heads at harvest, and compare size, wrapper quality, and maturity from one season to the next.

Container growing

A controlled environment.

Recommended pot size
At least 30 cm (12 in) deep and 40 to 50 cm (16 to 20 in) wide, with generous drainage
Use a pot at least 30 cm (12 in) deep and 40 to 50 cm (16 to 20 in) wide for several cloves, with many holes and slight elevation. Fill it with structured, light, fertile mix enriched with mature compost and omit a gravel layer. Plant points upward at 8 cm (3 in), with 15 cm (6 in) between cloves. Water until drainage occurs, then let the surface begin drying between applications without drying the root ball. Place in full sun or bright partial shade. After fall cooling, mulch and protect the sides against rapid freeze-thaw cycles; group the container beside a sheltered wall or surround it with breathable insulation. In spring, clear holes, feed lightly, and remove weeds. Cut scapes, then reduce water as leaves brown. To harvest, tip the root ball gently or use a narrow fork without pulling. Cure heads outside the pot and replace part of the mix before growing an unrelated crop. Never leave water in a saucer. During prolonged winter rain, move the pot beneath an open shelter that blocks excess water while preserving natural cold and airflow. Mark the container permanently and protect curing heads from rain after lifting.
Duganski garlic (<em>Allium sativum var. ophioscorodon</em> ‘Duganski’)

Bloom and dimensions

The complete profile.

Flower color Purple when umbels mature
Foliage color Green
Foliage type Deciduous, strap-like, and aromatic
Growth rate Moderate
Bloom period
In late spring, Duganski produces a sturdy scape making a tight curl before carrying a purple umbel. Harvest it while tender and before straightening to direct more energy toward the head. Selected umbels may remain for observation and insects; they produce many bulbils and sometimes fertile flowers, but propagation takes several seasons.
Fruiting
Duganski forms no fleshy fruit. A retained umbel can produce many small purple bulbils and, under some conditions, a few fertile seeds. These propagules require several years before creating a cooking-size head. To preserve yield, cut most scapes and propagate the cultivar instead with large healthy cloves from the harvest.
Harvest
Midsummer, when lower leaves brown while four or five upper leaves remain green
Duganski garlic (<em>Allium sativum var. ophioscorodon</em> ‘Duganski’)

Garden associations

What to plant with it.

Good companions
Use companion crops mainly to organize succession. Early lettuce, radishes, or spinach may occupy intervals when harvested before heads enlarge. Calendula and flowering herbs beside the bed support beneficial insects without competing with roots. After garlic, sow dwarf beans or an unrelated cover crop. Avoid tall dense vegetation, then keep garlic, onions, leeks, and shallots out of this plot for four years.
Avoid planting with
Avoid saturated soil, fresh manure, dense weeds, and repeated Allium crops. Do not plant garlic, onions, shallots, or leeks in this plot for four years after Duganski. Exclude tall neighbours that shade the row and crops planted so closely that airflow suffers. Discard every diseased head rather than composting it or saving it as planting material.
Use Duganski when a recipe needs a distinct garlic presence. Raw, it strengthens pesto, salsa, dressing, and marinades; roasted or simmered, it develops deep nutty richness. Large cloves are straightforward to peel, while tender garlic scapes can be grilled, sautéed, or chopped into compound butter. After curing, store heads in an airy basket and reserve the healthiest for planting.

From the garden to inspiration.

Roasted Duganski spread — Preheat the oven to 190°C (375°F). Remove loose outer wrappers from one head, trim clove tips lightly, and place it in a small dish. Drizzle with 10 ml (2 tsp) olive oil, add thyme and pepper, then cover. Roast for 40 to 55 minutes until the flesh becomes meltingly soft. Cool briefly and squeeze cloves from their skins. Mash with 30 g (2 tbsp) cream cheese or white beans, 5 ml (1 tsp) lemon juice, and a pinch of salt. Serve on bread or with vegetables. Refrigerate within two hours and use within three days. Cooking transforms fiery heat into nutty depth. Never keep a garlic-and-oil mixture at room temperature because its low-oxygen environment can support botulism toxin formation. Because Duganski cloves are large, test doneness near the centre and extend roasting in five-minute intervals when needed. Freeze extra spread in small labelled portions rather than holding it for extended refrigeration.

Frequently asked questions

Everything toknow.

Duganski generally carries 7 to 10 large cloves per head, so 3 bulbs may provide approximately 21 to 30 planting cloves; the actual number varies by head. Separate them only at planting time to limit drying. Keep wrappers and basal plates intact, then discard every soft, spotted, or injured clove. Position the largest in the main row, point upward, at 8 cm (3 in) deep and 15 cm (6 in) apart. Every healthy clove normally produces one plant and a new head. Label the row so Duganski identity remains secure through harvest and curing. Record the actual clove count because natural variation affects row length and future planting plans.
This hardneck uses winter cold to differentiate cloves and form a structured head. Planting in October or November after early light frosts but before lasting soil freeze lets roots begin without encouraging a long exposed shoot. Set cloves in draining soil, then wait until the surface cools before adding 10 to 15 cm (4 to 6 in) of mulch. This cover reduces frost heaving without keeping soil saturated. Duganski is hardy to Zone 2, but that hardiness never compensates for slow drainage. Avoid wet hollows and mark the row clearly so spring shoots are not disturbed. Check mulch after winter winds and replace only what is needed to keep coverage even.
Cut the scape after it nearly completes its tight curl but before it straightens and becomes fibrous. At this stage it is tender, and removal lets the plant devote more reserves to the head. Cut cleanly just above the upper leaf with a sanitized tool; never pull the stem. Rinse, dry, and keep scapes in a perforated refrigerator bag for approximately one week. They can be grilled, sautéed, or made into pesto. Leave only one scape to open when observing purple flowers and bulbils, accepting that this plant may form a somewhat smaller head. Refrigerate harvested scapes promptly and use them while crisp for the best texture and flavour.
Check in midsummer once several lower leaves brown while four or five upper leaves remain green. Lift a sample head: cloves should fill their wrappers without bursting them. Harvesting too early gives small heads, while lifting too late exposes cloves and shortens storage. Stop watering two weeks beforehand, then use a fork placed safely away and never pull the stems. Cure whole plants for two to four weeks in shade with dry, strong airflow before trimming roots and foliage. Protect heads from rain and direct sun throughout curing to preserve wrapper quality. Label saved heads before moving the remaining crop into kitchen storage.
No. Cloves, bulbs, and scapes are edible for people, but Alliums can damage red blood cells in dogs and cats. Risk remains with raw, cooked, dried, or powdered garlic. Keep all 3 planting bulbs, harvested heads, scraps, and spread beyond their reach. A large or repeated exposure may cause vomiting, weakness, rapid breathing, pale gums, or dark urine. If exposure is possible, contact a veterinarian promptly and provide Allium sativum with the estimated amount. Do not induce vomiting or use home remedies without professional instructions. Store curing heads on racks pets cannot reach. Clean dropped pieces from floors immediately and secure kitchen waste.

Its strengths, naturally.

Not recommended for pets

Pets

Pollinators
Attracts or supports pollinating insects

Pollinators

Deer
Less attractive or generally tolerated by deer

Deer