Ornamental bulbs

Van Noort

Solanum tuberosum

Sold out

Pay in 4 interest-free payments withSezzle

Delivery and pickup: view conditions

Product information
Advice adapted to Canada
Secure payment
Share

From bulb to bloom

Common nameInnovator potato
FamilySolanaceae
GenusSolanum
Speciestuberosum
CultivarInnovator
Bulb typeSeed potato
Botanical nameSolanum tuberosum
Quantity per pack500 g

‘Innovator’ Potato (Solanum tuberosum ‘Innovator’) is a Dutch early-to-mid-season cultivar known for long-oblong tubers with finely flaked russeted tan skin, shallow, evenly distributed eyes, and pale-yellow to yellowish-white flesh that retains its colour after cooking. The Van Noort product contains 500 g of No. 1 seed potatoes. Plants form upright clumps approximately 75 cm tall and 60 cm wide. High yield with uniform grading, uniform grading and good resistance to internal bruising make Innovator versatile for fresh cooking and homemade chips. Numerous white flowers may appear above yellowish-green foliage before tubers mature beneath the soil.

Plant in spring when soil reaches at least 7 °C and can be worked without sticking. Choose full sun and loose, deep, fertile, moist, very well-drained soil. Set whole seed tubers or healed pieces carrying at least one eye 10 to 12 cm deep, spacing them 30 to 40 cm apart with 75 to 95 cm between rows. When stems reach approximately 15 to 20 cm, draw soil around their bases. Repeat hilling as growth continues so every developing tuber remains covered. Good coverage prevents greening and protects shallow tubers from light exposure.

Maintain even moisture during growth and tuber formation without saturating the soil. Watch for Colorado potato beetles, aphids, late blight, and common scab; a three-to-four-year rotation with non-solanaceous crops helps interrupt several pest and disease cycles. Harvest small new potatoes after flowering, or wait until foliage yellows and dries for a storage crop. Let skins dry, brush soil away gently, and store only sound tubers in a dark, cool, humid, ventilated place. Never eat sprouts or green portions. Discard soft, mouldy, badly damaged, or extensively green tubers rather than storing them.

Light and life cycle

In the garden

Exposure
Full sun
Life cycle
Perennial grown as an annual food crop
Planting and establishment

Planting guide

Planting & establishment

Spacing / density

space plants or bulbs 10 to 15 cm (4 to 6 in.).

Planting period

In spring, after the risk of frost has passed

Propagation

Whole seed tubers or healed pieces carrying at least one eye

Growing method

Pre-sprout tubers for two to three weeks in a bright, cool, frost-free place when faster emergence is desired. Cut only large tubers into pieces carrying at least one eye and let cut surfaces dry for one or two days. Plant when soil reaches 7 °C, setting pieces 10 to 12 cm deep and 30 to 40 cm apart with 75 to 95 cm between rows. Water after planting without saturating the ground. When stems reach 15 to 20 cm, draw soil around their bases while leaving upper leaves visible. Repeat hilling so no tuber becomes exposed. Keep the row weed-free, water evenly during tuber formation, and inspect foliage weekly. Harvest after natural yellowing for storage, then let tubers dry away from light before placing only sound potatoes in a dark, cool, humid, ventilated location. Never wash storage potatoes until use. After emergence, keep the row free of weeds without cultivating deeply near roots. Inspect leaf undersides for orange egg masses and remove Colorado potato beetles. Remove foliage showing concerning symptoms and clean tools before moving to another plot. Once vines yellow, stop watering for several days before lifting tubers. Sort the harvest immediately, use damaged potatoes first, and keep selected seed tubers separate. Record the planting position so the next potato crop can move to a different plot in the rotation.
Soil and care

Soil and care

Soil & care

Soil pH

pH 6.0 to 7.5

Moisture

Evenly moist soil, never waterlogged

Care level

Easy

Watering

Water after planting, then maintain even moisture as stems grow and tubers enlarge. Check beneath the hill and water deeply when the upper few centimetres begin drying. Avoid alternating drought and excess water, which can distort or split tubers. Irrigate at soil level in the morning so foliage stays dry. Reduce applications as vines yellow before the storage harvest. Never leave the row saturated because oxygen-poor soil encourages rot and weak root development.

Soil type

Loose, deep, fertile, well-drained soil lets large long-oblong tubers develop without distortion. Sandy loam enriched with compost holds useful moisture while allowing air circulation. Remove stones and break clods before planting. Avoid compacted or waterlogged areas. Maintain mildly acidic soil, hill regularly, and use a three-to-four-year rotation with non-solanaceous crops. Deep preparation matters particularly for Innovator because very large tubers need unobstructed soil volume to retain their uniform shape.

Fertilization

Incorporate mature compost before planting and use a balanced fertilizer formulated for root crops according to its label. Avoid excess nitrogen, which produces abundant foliage at the expense of tubers. Keep fertilizer away from seed tubers to prevent injury. A soil test helps correct phosphorus and potassium needs accurately. Stop late feeding as vines begin yellowing. Never apply fresh manure directly in the planting trench because high salts and uneven nutrients can damage developing roots.

Seasonal care

In early spring, prepare a new plot that has not carried potatoes, tomatoes, peppers, or eggplants for three to four years. Remove stones, incorporate compost, and plant when soil reaches 7 °C. After emergence, weed carefully and begin hilling when stems reach 15 to 20 cm. Repeat after heavy rain or whenever a tuber becomes visible. During summer, keep soil moist, inspect leaf undersides weekly, and remove Colorado potato beetles, larvae, and egg masses. Remove diseased foliage and do not compost it. After flowering, lift a few new potatoes when desired. For storage, wait until vines yellow and dry, stop watering, then lift the crop in dry weather. Let tubers dry in shade, sort them, and store without washing. Destroy volunteer potato plants the following spring so they do not harbour disease. Follow with a non-solanaceous crop and keep records of the rotation. Check stored potatoes regularly and remove any soft or sprouting tuber before problems spread. During growth, replace soil displaced by watering and inspect ridge sides so no tuber becomes visible. Support stems only when they lodge, without covering foliage. As harvest approaches, remove weeds before they set seed. Clean storage crates before adding the crop and keep them away from light. Inspect tubers monthly and remove every potato that softens or sprouts heavily. In the following spring, remove any volunteer arising from an overlooked tuber. These steps limit disease carryover, protect the stored crop, and keep the rotation effective for the next garden season.
Growing in containers

Container growing

Container growing

Recommended pot size

container at least 25 to 30 cm (10 to 12 in.) deep, with drainage
Choose a container holding at least 50 to 60 L, 45 cm deep or more, with numerous drainage holes. Fill the bottom with 15 cm of rich, drained potting mix, then set two or three small tubers according to pot diameter. Cover with 10 cm of mix and water. When stems reach 15 cm, add mix gradually around them without burying every leaf. Continue until approximately 5 cm below the rim; this replaces field hilling. Place the pot in full sun and rotate it for even growth. Check moisture daily in warm weather because containers dry quickly, but empty every saucer. Feed lightly according to a vegetable fertilizer label. Harvest a few tubers after flowering or empty the container once foliage yellows. Do not reuse the mix for another solanaceous crop the following season. Sort and store only firm tubers without green areas. Keep the container away from roof runoff that could saturate it during storms. Space containers so air circulates around foliage and avoid splashing leaves during watering. Inspect lower stems often because a tuber can appear beside the wall as potting mix settles. Add fresh mix immediately to cover it. After harvest, wash the container and replace the growing medium before using it again for a solanaceous crop. Store harvested tubers in an opaque basket rather than leaving them exposed on a sunny balcony or patio.
Growth and flowering

Size, flowering & harvest

Mature height

30 to 60 cm (12 to 24 in.)

Width / spread

10 to 20 cm (4 to 8 in.)

Foliage color

Green

Foliage type

Deciduous foliage that becomes dormant after flowering

Growth rate

Moderate

Growth habit

Medium-large, semi-erect plant

Fragrance

Subtle fragrance

Edible parts

Mature, firm, non-green tubers only; sprouts, berries, leaves, stems, and green portions are toxic

Bloom period

Numerous white flowers may appear in late summer above yellowish-green foliage. They show progress through the cycle, but tubers continue enlarging underground. Several berries may follow the flowers; they are toxic and must never be eaten. For a storage crop, wait for natural vine yellowing and skin set rather than relying on blossoms alone. Flowering varies with weather and fertility and is not required for a successful tuber harvest.
Garden companions

Garden associations

Companion plants & uses

Companion plants

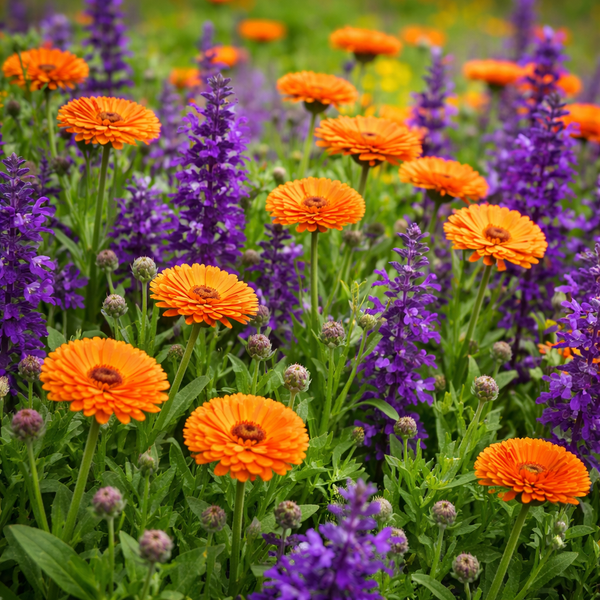
Beans, peas, lettuce, spinach, and radishes can share the food garden when every crop keeps enough space, light, and water. Flowers such as calendula and sweet alyssum attract useful insects along the edge without interfering with hilling. Keep companions outside the row so soil can be drawn around potato stems. Prefer non-solanaceous crops that simplify rotation in following years. Avoid vigorous plants that shade foliage or compete with developing tubers. Companion planting does not replace weekly pest inspection or proper crop rotation.

Garden use

Place ‘Innovator’ in a sunny plot where soil can be loosened deeply. Set rows 75 to 95 cm apart so hilling, watering, and movement do not compact the root zone. Label both ends to identify the cultivar after foliage disappears. A 500 g pack can be divided into sections for slightly staggered planting as soil warms. Pair the crop with a mulched path that simplifies leaf inspection and harvest after rain. Keep tomatoes, peppers, and eggplants in a different plot to make rotation easier. After harvest, sow a non-solanaceous cover crop to protect soil and improve structure. Never leave exposed tubers near play areas. For containers, choose a 50 to 60 L vessel and add potting mix as stems grow. Clean tools before moving to another plot and dispose of diseased foliage away from household compost. Mark the rotation plan for the next three seasons so potatoes do not return too early. Check for volunteer plants the following spring and remove them promptly. Reserve a shaded work area near the garden for sorting the harvest without exposing tubers to sun. Use ventilated, opaque baskets and move them promptly to storage. Never keep potatoes in a clear bag. A small garden map helps move the row every year and avoid former solanaceous plots. This simple record also makes it easier to compare yield, pest pressure, and harvest timing from one season to the next.
Recipe and storage

Recipe idea

From garden to table

Make homemade chips with ‘Innovator’ potatoes. Scrub 600 g of firm tubers with no sprouts or green portions. Slice them very thinly and evenly with a mandoline fitted with its hand guard. Rinse slices in cold water, then dry them completely. Toss with one tablespoon of oil and a small pinch of salt. Arrange in one layer on parchment-lined baking sheets. Bake at 200°C for 15 to 25 minutes, turning slices and removing pieces that brown quickly. Cool on a rack for a crisp texture. Discard every soft, mouldy, bitter, or extensively green tuber. Watch constantly because slice thickness changes the required time. Store cooled chips in an airtight container and eat them promptly. Never let children operate a mandoline without direct supervision. Use clean equipment and keep uncooked slices refrigerated if preparation is interrupted. For variation, season part of the cooled batch with mild paprika or dried herbs. Add spices gradually so they do not mask the potato flavour. Discard any portion that becomes damp or develops an unusual odour.

Frequently asked questions

Frequently asked questions

When and how should Innovator seed potatoes be planted?
Plant in spring when soil reaches at least 7 °C. Choose full sun and loose, fertile, moist, well-drained soil. Set small whole seed tubers or healed pieces carrying at least one eye 10 to 12 cm deep, spacing them 30 to 40 cm apart with 75 to 95 cm between rows. Water without saturating the ground. When stems reach 15 to 20 cm, draw soil around their bases. Repeat hilling so every tuber remains covered and cannot turn green. Avoid ground that has carried potatoes, tomatoes, peppers, or eggplants within the previous three years. Label the row clearly and keep seed tubers separate from food potatoes.
Should Innovator tubers be cut or pre-sprouted?
Pre-sprouting is optional, but two to three weeks in a bright, cool, frost-free place can speed emergence. Keep sprouts short and sturdy. Plant small tubers whole. Cut only large tubers into pieces carrying at least one healthy eye and enough flesh to support the shoot. Let cut surfaces dry for one or two days so they heal. Discard every soft, mouldy, or diseased tuber. Handle sprouts carefully during planting. Do not use an extensively green or deteriorated tuber as seed merely because it has begun sprouting. Plant promptly once soil conditions are suitable, and never allow prepared pieces to dry completely.
Why should Innovator potato plants be hilled?
Hilling keeps developing tubers away from light. An exposed tuber can turn green and accumulate higher levels of toxic glycoalkaloids. When stems reach approximately 15 to 20 cm, draw loose soil around their bases while leaving upper leaves visible. Repeat after heavy rain or whenever the ridge settles. Hilling also provides more loose soil for stolons, supports stems, and makes harvest easier. Inspect row sides regularly and cover every visible tuber immediately. Never eat green portions and discard extensively green potatoes. In containers, add potting mix gradually around stems to provide the same protection without burying all active foliage. In containers, add fresh mix whenever a tuber appears beside the wall.
When should Innovator be harvested for storage?
For new potatoes, lift several tubers after flowering. For a storage crop, wait until foliage yellows and dries naturally. Reduce watering, then lift tubers in dry weather with a fork positioned well away from stems. Let them dry in shade, brush soil away gently, and do not wash before use. Sort the harvest immediately. Store only firm, intact tubers in a dark, cool, humid, well-ventilated place. Use slightly damaged potatoes promptly and check the stored crop regularly. Remove every soft, mouldy, heavily sprouted, or green tuber before decay spreads. Keep seed potatoes clearly labelled and separate from the crop intended for eating.
Which parts of a Innovator potato plant are edible?
Only mature, firm, non-green tubers are edible after normal preparation. Leaves, stems, flowers, tomato-like berries, and sprouts contain toxic glycoalkaloids and must never be eaten. Remove sprouts and every small green area before cooking; discard an extensively green, bitter, soft, or mouldy tuber. Keep berries and plants beyond the reach of children and animals. If a person or animal eats a toxic part or develops symptoms, contact a poison centre, healthcare professional, or veterinarian promptly. Provide the botanical name Solanum tuberosum and identify the plant part involved. Store harvested potatoes in darkness to prevent greening and inspect them regularly. Never use the berries as food under any circumstances.

Wildlife and pets

Wildlife & precautions

Reported toxicity

Yes

Complete your purchase

Click a product to build your selection.

Your selection

Total