Organic 'Balena' F1 Celeriac Seeds

Organic 'Balena' F1 Celeriac Seeds by Gaia, product image prepared for Canadian gardeners.
PÉPINIÈRE.CA

Organic 'Balena' F1 Celeriac Seeds

BACK-IN-STOCK ALERT

Don’t miss its return.

Leave your email and receive an alert when this product is available again.

An alert for this product only. No newsletter signup. Privacy

Gaia

Apium graveolens

Sold as Approximately 60 seeds

Available

Pay in 4 interest-free payments withSezzle

Delivery and pickup: view conditions

Product information
Advice adapted to Canada
Secure payment
Share
Common nameBalena F1 Celeriac
FamilyApiaceae
GenusApium
Speciesgraveolens
CultivarBalena
TypeOrganic F1 hybrid seeds
Botanical nameApium graveolens

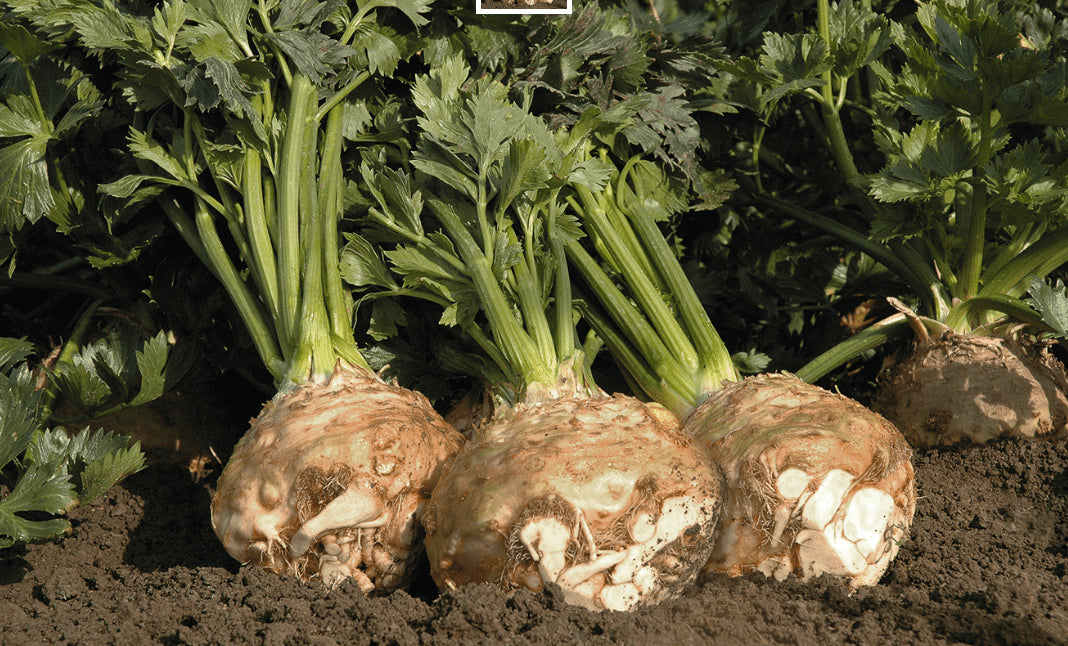
Organic 'Balena' F1 Celeriac Seeds (Apium graveolens). This Bejo hybrid produces a rounded celeriac with white flesh, upright foliage, and little internal pithiness. Its shape helps with cleaning, and its mild celery flavour suits remoulade, soups, mash, and roasted vegetable dishes. Bejo reports quick maturity, exceptional cold tolerance, and intermediate resistance to specified races of Fusarium and Septoria. The Gaia packet contains approximately 60 certified organic seeds. The species is biennial, although the swollen vegetable portion is harvested during its first growing season. Consistent moisture supports a smooth, well-sized swollen stem and dependable kitchen quality. For practical seed starting, growing from seed succeeds best when the verified product depth, moisture and temperature guidance is followed.

Sow indoors 10 to 12 weeks before planting out. Scatter seed over fine, moist seed-starting mix, then cover with only a very light sprinkling of growing medium. Maintain approximately 15 to 21°C and even moisture; germination can be slow and uneven and generally takes 14 to 21 days. Move seedlings into bright light and transplant them individually once they can be handled. Harden plants off gradually, then plant after persistent cold has passed without burying the crown. Space plants approximately 30 cm apart in rows 40 to 45 cm apart. Water immediately after planting to settle soil around the roots. Use the product details as a clear guide on how to start seeds while keeping the growing medium evenly moist, never saturated. For indoor seed starting, count back from local conditions and frost dates to decide when to start indoor seeds.

Grow ‘Balena F1’ in full sun or light shade and rich soil that stays consistently moist but never waterlogged. Insufficient moisture limits development of the swollen stem, while prolonged cold exposure when plants are young may trigger premature bolting. Keep the bed free of weeds and mulch without covering the crown. Bejo lists approximately 108 growing days. Harvest when the swollen portion reaches the desired size by lifting it carefully with a garden fork. Remove small roots and the outer skin before eating the swollen stem raw or cooked. Wear gloves if the foliage irritates skin during exposure to sunlight.

In the garden

Exposure
Full sun to partial shade
Life cycle
Biennial

Sowing guide

Sowing & germination

Sowing depth

Surface sow; cover very lightly

Spacing / density

30 cm between plants; 40 to 45 cm between rows

Germination temperature

15 to 21 °C (59 to 69.8 °F).

Germination time

14 to 21 days

Sowing period

Start seeds indoors 10-12 weeks before planting. Transplant is highly recommended. Can be transplanted 2-3 weeks before the last frost. May bolt if the room temperature below 12°C in the day and 4°C at night.

Propagation

Seed propagation

Growing method

For Balena F1 Celeriac, follow these sowing and growing guidelines for the variety. Start seeds indoors 10-12 weeks before planting. Transplant is highly recommended. Can be transplanted 2-3 weeks before the last frost. May bolt if the room temperature below 12°C in the day and 4°C at night. Surface sow; cover very lightly 15 to 21°C 14 to 21 days Read the packet directions before starting and keep the label so the variety remains clearly identified throughout the season. Prepare a clean, loose, well-drained growing medium and moisten it before placing the seeds so they are not displaced by the first watering. Keep the seedbed evenly moist without standing water because excess moisture reduces air around developing roots. Move seedlings into bright light as soon as they emerge and rotate containers regularly to encourage balanced growth. Where several seedlings compete for the same space, thin carefully and retain the strongest plants without disturbing their roots. Before outdoor planting, gradually acclimatize young plants to wind, sunlight, and changing temperatures over several days. Follow the stated spacing so air can move between plants and each plant receives adequate light, water, and nutrients. Water at soil level when the surface begins to dry, then adjust frequency for weather, drainage, and container volume. This seed starting sequence supports reliable growing from seed while preserving the product-specific depth and temperature facts.

Soil and care

Soil & care

Care level

Moderate

Seasonal care

For Balena F1 Celeriac, adjust seasonal care to the plant’s actual growth cycle. After transplanting, keep soil consistently moist without waterlogging it. Mulch to reduce evaporation while leaving the crown exposed. Gradually remove outer leaves as they fall horizontal and watch for slugs, celery leaf miner, and leaf spot. Prolonged cold exposure can trigger premature bolting in young plants, so wait for stable conditions before planting outdoors. Read the packet directions before starting and keep the label so the variety remains clearly identified throughout the season. Prepare a clean, loose, well-drained growing medium and moisten it before placing the seeds so they are not displaced by the first watering. Keep the seedbed evenly moist without standing water because excess moisture reduces air around developing roots. Move seedlings into bright light as soon as they emerge and rotate containers regularly to encourage balanced growth. Where several seedlings compete for the same space, thin carefully and retain the strongest plants without disturbing their roots. Before outdoor planting, gradually acclimatize young plants to wind, sunlight, and changing temperatures over several days. Follow the stated spacing so air can move between plants and each plant receives adequate light, water, and nutrients. Water at soil level when the surface begins to dry, then adjust frequency for weather, drainage, and container volume. A light mulch can reduce splashing and moisture swings after the soil has warmed and plants are established.

Container growing

Container growing

Growing Balena F1 Celeriac in a container requires suitable volume, drainage, and exposure. 5 to 10 L per plant with free drainage. Match the container to the plant's development and provide free drainage from planting onward. Read the packet directions before starting and keep the label so the variety remains clearly identified throughout the season. Prepare a clean, loose, well-drained growing medium and moisten it before placing the seeds so they are not displaced by the first watering. Keep the seedbed evenly moist without standing water because excess moisture reduces air around developing roots. Move seedlings into bright light as soon as they emerge and rotate containers regularly to encourage balanced growth. Where several seedlings compete for the same space, thin carefully and retain the strongest plants without disturbing their roots. Before outdoor planting, gradually acclimatize young plants to wind, sunlight, and changing temperatures over several days. Follow the stated spacing so air can move between plants and each plant receives adequate light, water, and nutrients. Water at soil level when the surface begins to dry, then adjust frequency for weather, drainage, and container volume. A light mulch can reduce splashing and moisture swings after the soil has warmed and plants are established.
Organic 'Balena' F1 Celeriac Seeds by Gaia, product image prepared for Canadian gardeners.

Size, flowering & harvest

Mature height

61 to 91 cm (24-36″)

Width / spread

30 to 46 cm (12-18″)

Foliage color

Green

Foliage type

Herbaceous

Growth rate

Moderate

Growth habit

Rosette or compact clump

Edible parts

Swollen stem after removing the outer skin

Days to maturity

Approximately 108 days

Harvest

Harvest when the swollen portion reaches the desired size. Lift the plant with a garden fork, remove the foliage and small roots, then brush away soil. Harvest can continue late into the season while the ground remains workable.
Organic 'Balena' F1 Celeriac Seeds by Gaia, product image prepared for Canadian gardeners.

Garden associations

Companion plants & uses

Companion plants

Choose neighbouring crops that also appreciate rich, moist soil without competing with celeriac for light or space. Maintain 30 cm around each plant and convenient access for watering. Good Apiaceae rotation and adequate airflow are more reliable than a rigid list of companion plants. Read the packet directions before starting and keep the label so the variety remains clearly identified throughout the season. Prepare a clean, loose, well-drained growing medium and moisten it before placing the seeds so they are not displaced by the first watering.

Plants to avoid

No specific enemy plant is confirmed for ‘Balena F1’. Avoid vigorous crops that rapidly dry the soil or cast dense shade. Do not repeatedly plant celery, celeriac, or other Apiaceae in the same location; rotation helps limit diseases and pests associated with this family.

Garden use

Grow ‘Balena F1’ for its white-fleshed swollen stem with a mild celery flavour. It can be grated raw, mashed, added to soups, or roasted. Plant in rich soil that stays moist without burying the crown. Allow approximately 30 cm between plants and a long season of about 108 growing days. Read the packet directions before starting and keep the label so the variety remains clearly identified throughout the season. Prepare a clean, loose, well-drained growing medium and moisten it before placing the seeds so they are not displaced by the first watering.

Recipe idea

From garden to table

For four servings with Balena F1 Celeriac, harvest about 300 g of leaves or tender stems at the recommended stage. Rinse thoroughly under potable water, drain, and remove damaged sections. Cut the crop into even pieces. Warm 15 ml of oil in a large skillet, add firmer stems first, then the leaves, and cook for a few minutes to the desired texture. Add 15 ml of lemon juice or mild vinegar, a small pinch of salt, and pepper. Serve with a cooked grain, pulses, or potatoes. Young leaves may also be used raw when that use is confirmed for the exact plant. Refrigerate leftovers in a closed container within two hours and use them promptly. Serve promptly to preserve the texture and aromas that distinguish this harvest. Taste before adding more salt so the variety’s own character remains at the centre of the dish. Use a clean board and utensils, then refrigerate promptly any portion that will not be served immediately. This straightforward preparation lets you adjust seasoning to the harvest’s maturity and natural flavour.

Frequently asked questions

Frequently asked questions

How many 'Balena' F1 Celeriac seeds are in the packet?
For Balena F1 Celeriac, the packet information states: Approximately 60 seeds. This wording preserves the commercial approximation when one is provided and helps plan the number of containers or the length of the row without turning an estimate into a guaranteed count. Keep the packet closed in a cool, dry, dark place until sowing time. Keep the label with the seedlings so the variety remains correctly identified throughout the season. Use clean containers and write the sowing date on a water-resistant label. Avoid exposing unused seed to moisture or large temperature swings.
How should I start 'Balena' F1 Celeriac seeds in Canada?
For Balena F1 Celeriac, the stated sowing period is the detailed directions in the product record. The recommended method is Seed propagation, at a depth of Surface sow; cover very lightly. Follow these product-specific directions and adjust timing to the average last-frost date in your area. Moisten the growing medium before placing the seed so the first watering does not displace it. Label every container and maintain even moisture without allowing standing water. Move seedlings into bright light as soon as they emerge to encourage balanced growth. Thin carefully when several seedlings compete for the same space. For seed starting, label the cultivar and use the stated sowing depth instead of a generic estimate.
How long do 'Balena' F1 Celeriac seeds take to germinate?
For Balena F1 Celeriac, the stated germination period is 14 to 21 days, with a germination temperature of 15 to 21°C. Keep these conditions as steady as practical while allowing excess water to drain away. The temperature of the growing medium matters more than the surrounding air during this stage. Check moisture below the surface before watering again and avoid saturating the medium. Good air circulation helps young plants remain vigorous after emergence. Wait until the normal germination window has passed before assuming a seed will not emerge. When growing from seed, keep conditions stable for the full stated germination window before disturbing the mix.
Where should I grow 'Balena' F1 Celeriac in the garden?
For Balena F1 Celeriac, the recommended exposure is Full sun to partial shade. The stated spacing guideline is 30 cm between plants; 40 to 45 cm between rows. For container growing, the product record recommends: 5 to 10 L per plant with free drainage. Allow for the mature habit so neighbouring plants do not restrict light or access for harvest. Choose a site that is easy to water and leave enough room for air to circulate around the foliage. In a container, make sure several holes allow excess water to drain freely. A light mulch can steady moisture after the soil has warmed and plants are established.
When and how should I harvest 'Balena' F1 Celeriac?
For Balena F1 Celeriac, the confirmed edible parts are: Swollen stem after removing the outer skin. Harvest them at the stage stated in the product record, then sort the crop before preparation. Use only the parts correctly identified as edible for this plant. Use a clean tool and handle the harvest carefully to avoid unnecessary injury to the plant. Harvest in dry weather when practical and remove damaged portions promptly. Wash only the parts intended for the kitchen and refrigerate perishable produce promptly. Never eat a plant part whose identity or edibility is uncertain.

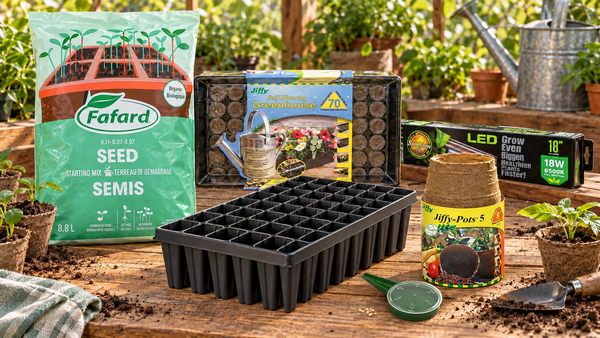
Seed-starting essentials

Click a product to build your selection.

Your selection

Total