Red paste tomato 'San Marzano' organic

Red paste tomato 'San Marzano' organic
PÉPINIÈRE.CA

Red paste tomato 'San Marzano' organic

BACK-IN-STOCK ALERT

Don’t miss its return.

Leave your email and receive an alert when this product is available again.

An alert for this product only. No newsletter signup. Privacy

Organic seeds

Tourne-sol

Solanum lycopersicum

Sold as 50 seeds

Sold out

Pay in 4 interest-free payments withSezzle

Delivery and pickup: view conditions

Product information
Advice adapted to Canada
Secure payment
Share
Common nameRed paste tomato ‘San Marzano’
FamilySolanaceae
GenusSolanum
Specieslycopersicum
CultivarSan Marzano
TypeSeeds
Botanical nameSolanum lycopersicum
Reproducible seedsYes
Heirloom varietyYes

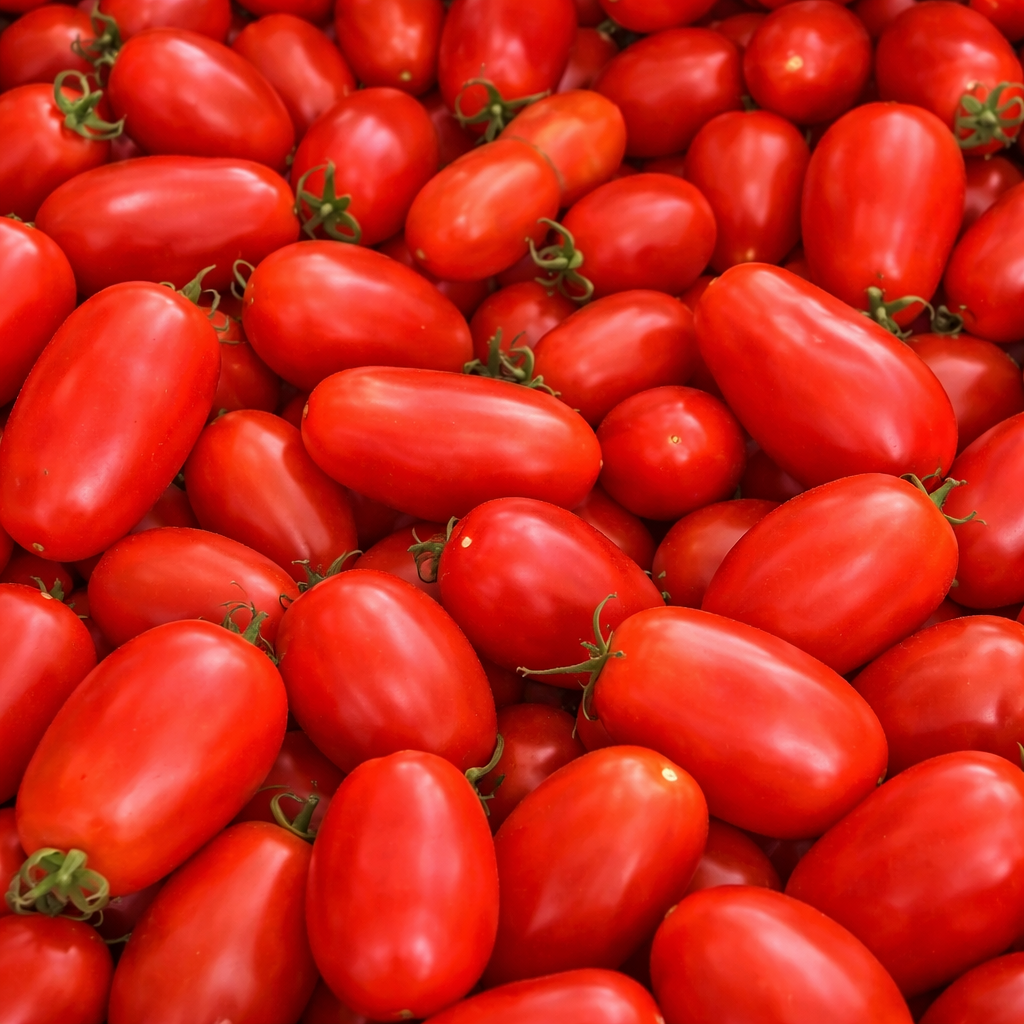
Red paste tomato 'San Marzano' organic (Solanum lycopersicum) is an open-pollinated variety with indeterminate growth. Tourne-Sol describes it as a slender red sauce tomato that is more elongated than a Roma. The packet contains 50 organic, open-pollinated seeds, and listed maturity is approximately 75 days from transplanting. Elongated red fruit is particularly useful for sauces, passata, roasting, and slow-cooked dishes. Because several strains carry the San Marzano name, this page prioritizes the characteristics published for Tourne-Sol product SL321-a and does not assign a protected geographical designation to the seed.

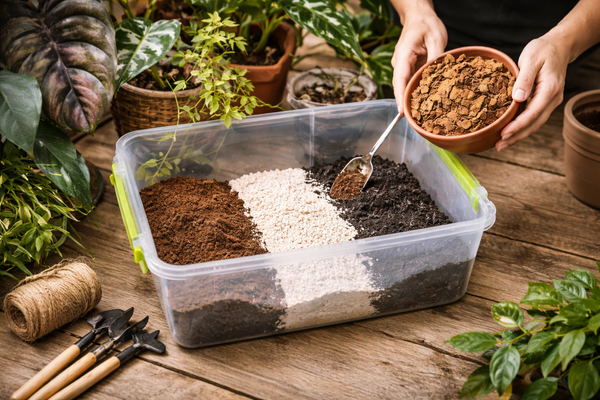
Sow indoors 6 mm deep in fine starting mix approximately six weeks before planting. Maintain steady warmth and even moisture until emergence, then move seedlings under intense light. Pot them on after true leaves appear and harden plants gradually for one week. Transplant outdoors only after the last frost, once the soil has warmed. Choose full sun and fertile, loose, freely drained soil, then space plants 60 to 75 cm apart. Immediately install a tall cage, sturdy stake, or trellis to guide the long indeterminate vines. Water seedlings before transplanting so each root ball remains intact.

Water deeply at soil level, keep moisture as consistent as possible, and mulch after the ground warms. Tie stems with broad, soft loops and remove leaves touching the soil. Harvest when fruit is evenly red, firm but slightly yielding, and easy to release. Pick regularly because the plant continues flowering and fruiting through the season. For room-temperature canning, use only a tested recipe and follow its acidification and processing time exactly. Before the first frost, bring developed fruit indoors to finish ripening in a temperate, ventilated place. Check stored fruit daily and discard anything that begins deteriorating.

In the garden

Exposure
Full sun, at least 6 direct hours

Sowing guide

Sowing & germination

Sowing depth

6 mm (1/4 in)

Spacing / density

60 to 75 cm (24 to 30 in) between plants

Germination temperature

24 to 29°C (75 to 85°F)

Germination time

Approximately 5 to 10 days in warm starting mix

Sowing period

Indoors, 6 weeks before planting; transplant after the last frost

Propagation

Seed

Growing method

Sow one seed per cell 6 mm deep in sterile, light starting mix approximately six weeks before planting. Keep the medium moist but not saturated and maintain 24 to 29°C until emergence. Remove the dome as soon as seedlings appear, then provide bright light for 14 to 16 hours and slightly cooler temperatures. Pot seedlings individually after the first true leaves. If plants become pale, feed at low strength. Harden them for one week by gradually increasing sun and wind exposure. Transplant after the last frost into warmed soil, burying the stem up to the first healthy leaves. Space plants 75 to 90 cm apart. Install tall support at planting time, water at soil level, and mulch once the ground is warm. Guide stems weekly and harvest when fruit becomes evenly red and yields slightly and the fruit yields slightly. Remove weeds while seedlings establish. Once plants begin flowering, gently shake the support at midday to encourage pollen release. Inspect leaf undersides and hand-pick the first caterpillars. Sanitize scissors after cutting suspicious plants and avoid working among wet foliage. From fruit set onward, follow tomato-fertilizer directions without exceeding the label. Maintain one main stem where space is limited, or several well-supported stems inside a large cage. Check ties after wind and loosen any loop that presses into expanding stems.

Soil and care

Soil & care

Care level

Intermediate; support and regular monitoring required

Watering

Water deeply at soil level when the upper few centimetres begin to dry. Maintain moisture as consistently as possible during flowering and fruit expansion; swings between drought and excess water encourage cracking and blossom-end rot. A soaker hose or drip line keeps foliage drier. Apply mulch after soil warms, empty saucers, and check large containers daily during hot weather. Water early in the day and avoid small, frequent surface applications.

Soil type

Choose fertile, loose, well-drained soil rich in mature organic matter, with slightly acidic pH around 6 to 6.8. Incorporate compost before planting according to needs shown by a soil test. A raised bed helps where ground remains cold or wet in spring. Avoid waterlogged areas and sites where diseased tomatoes, potatoes, peppers, or eggplants grew recently. Rotate away from the nightshade family whenever practical.

Fertilization

Base fertilization on a soil test. Incorporate mature compost before planting, then use balanced vegetable fertilizer according to its label. After fruit set, tomato feed with moderate nitrogen is preferable to a high-nitrogen application. Excess nitrogen produces abundant foliage and delays fruit. Water after feeding, never place concentrated fertilizer against the stem, and reduce applications late in the season. Container plants need smaller, more regular doses because nutrients leave through drainage water.

Seasonal care

Six weeks before planting, sow indoors in warm mix and move seedlings under intense light immediately after emergence. Pot them on when true leaves develop and rotate containers to maintain straight stems. One week before planting, gradually harden plants to sun, wind, and cooler nights. After the last frost, transplant deeply into warmed soil and immediately install a tall cage, stakes, or trellis. Through summer, tie new stems with soft loops, water consistently at soil level, and keep mulch from touching the stem. Remove leaves resting on soil and monitor for leaf spots, wilting, caterpillars, and damaged fruit. Sanitize tools between suspicious plants. Harvest elongated red tomatoes every few days. Late in the season, remove new flowers that cannot mature, gather developed fruit before frost, and discard diseased remains instead of placing them in home compost. Clean supports before storing them. If fruit develops a dark, sunken patch at the blossom end, stabilize watering instead of automatically adding calcium without a soil test. After prolonged rain, ventilate shelters and inspect new spots before touching neighbouring plants. During extreme heat, light afternoon shade cloth may reduce stress without blocking morning sun. Record every confirmed disease so a different crop family can occupy that area next year. Save seed only from vigorous plants and symptom-free fruit. Wash hands and tools after handling diseased material, and never move infected soil into clean containers. throughout the season.

Container growing

Container growing

Recommended pot size

One plant per stable 30 to 40 L container, at least 40 cm deep
Because ‘San Marzano’ red paste tomato is indeterminate, choose a very stable 30 to 40 L container at least 40 cm deep for one plant. Several large drainage holes are essential. Fill it with quality vegetable potting mix amended with mature compost, leaving watering space at the rim. Install a tall cage or firmly anchored trellis before planting. Position the container in the warmest, sunniest location sheltered from wind. Bury part of the stem and water thoroughly. Maintain consistent moisture thereafter, sometimes checking daily in hot weather, without leaving water in the saucer. Feed with tomato fertilizer according to its label once fruit begins forming. Tie stems, remove leaves resting on the mix, and harvest frequently. Rotate only small pots; a large supported container should remain stationary. Before frost, bring developed fruit indoors rather than moving the entire plant. Mulch the warm potting mix without touching the stem. After heavy rain, confirm that drainage holes remain open and that the container is not leaning under trellis weight. Inspect leaf undersides, pick every ripe fruit, and promptly remove split or mouldy tomatoes. Label the cultivar clearly when planning to save seed. At the end of the season, clean the cage and replace the mix instead of reusing soil that held a diseased plant. Keep the container away from roof runoff that could saturate it during storms.
Red paste tomato 'San Marzano' organic

Size, flowering & harvest

Foliage color

Green

Foliage type

Deciduous; killed by frost

Growth rate

Steady in warm weather; approximately 75 days from transplanting

Growth habit

Indeterminate, vining, and branching

Edible parts

Ripe fruit

Fruiting

Slender red tomatoes, more elongated than a Roma, develop successively on indeterminate vines. Tourne-Sol gives a commercial guide of approximately 75 days from transplanting. Harvest when red colour is even, fruit remains firm but yields slightly, and it releases readily. A tall cage distributes cluster weight, while consistent moisture helps limit splitting. Dimensions and ripening speed may vary with warmth, light, fertility, and watering. Inspect ripening clusters regularly, pick ripe fruit promptly, and support any vine that begins bending.

Days to maturity

Approximately 75 days from transplanting

Harvest

Approximately 75 days after transplanting; evenly red, firm but slightly yielding
Red paste tomato 'San Marzano' organic

Garden associations

Companion plants & uses

Companion plants

Basil, parsley, lettuce, radishes, onions, and bush beans can share the area when every plant receives sufficient sun, air, water, and nutrients. Position short crops on the sunny side and keep the tomato base accessible for watering. These combinations mainly organize the bed efficiently; they do not prevent pests or diseases on their own. Avoid crowding other nightshade crops around the plant because they share several problems and make rotation more difficult. Leave clear access to the trellis for tying and harvesting.

Garden use

Use ripe tomatoes for sauces, passata, soups, stews, roasting, or drying. Their slender elongated shape simplifies cutting and cooking. Wait for even red colour and slight yielding before picking. Wash fruit under running water, remove the stem, and discard any mouldy or badly damaged tomato. Refrigerate cut fruit promptly. For room-temperature canning, use only a tested recipe and follow its acidification, jar size, and processing time exactly. A side-by-side tasting can also compare the same fruit fresh, roasted, and reduced into sauce. Label each preparation and record preferred uses for planning future harvests. Freeze surplus sauce in small dated portions after cooling it promptly. Note which preparation best suits the fruit texture and cooking time.

Recipe idea

From garden to table

Roasted San Marzano sauce: heat the oven to 200°C. Wash 1 kg ripe tomatoes, halve them, and place them in a baking dish with one small sliced onion and three garlic cloves. Add 30 mL olive oil, 5 mL oregano, salt, and black pepper. Roast for 35 to 45 minutes until fruit softens and juices bubble. Blend carefully, then serve over pasta or freeze in portions after cooling. Refrigerate leftovers within two hours. This recipe is not designed for room-temperature canning. Use clean utensils and discard any mouldy tomato before preparation. For a rustic texture, crush fruit only with a spoon; for a smooth sauce, use an immersion blender after the mixture cools slightly. Add fresh basil after cooking. Taste before adding more salt or acidity. Cool large quantities in several small containers instead of one deep pot. Keep frozen portions clearly dated and reheat until steaming before serving. Thaw frozen sauce safely in the refrigerator.

Frequently asked questions

Frequently asked questions

When and how should ‘San Marzano’ tomato be sown?
Start seed indoors approximately six weeks before the planned planting date. Place one seed per cell 6 mm deep in sterile, lightly moist mix. Maintain 24 to 29°C until emergence, generally within five to ten days, then remove the dome and move seedlings under bright light for 14 to 16 hours daily. Slightly cooler temperatures after germination create sturdier stems. Pot seedlings individually when the first true leaves appear. Rotate pots, water from below when needed, and feed lightly if plants become pale. Harden them gradually for one week. Transplant outdoors only after the last frost into warmed soil because this tender tomato is killed by frost. Install support at planting time and water every root ball thoroughly.
Does indeterminate ‘San Marzano’ tomato need support?
Yes. Tourne-Sol classifies ‘San Marzano’ as an indeterminate tomato. Install a tall cage, sturdy stake, or trellis at planting time before roots fill the space. Guide vines as they lengthen and use broad, soft ties beneath clusters without tightening them. Check ties after wind or heavy rain. Remove only damaged leaves or those touching the soil, then harvest regularly to reduce weight on vines. A well-anchored support also makes inner fruit easier to reach and improves air circulation around the plant. Inspect the support weekly and loosen any tie that marks an expanding stem. Add a loop beneath a heavy cluster instead of directly around its fruit stem. Keep a clear path for harvesting without bending vines. Place the support where it will not shade neighbouring low crops.
How can a ripe ‘San Marzano’ tomato be recognized?
Tourne-Sol lists approximately 75 days from transplanting. Observe the fruit rather than relying on the calendar alone: a ripe tomato has even red colour, remains firm but yields slightly to gentle pressure, and releases readily. Pick fruit individually because indeterminate growth extends production. Warmth, light, and watering may advance or delay maturity. Harvest nearly ripe fruit before heavy rain to reduce splitting risk, then allow it to finish colouring indoors if needed. Check harvested fruit daily and use any softened tomato promptly. Place harvested fruit in a single layer to avoid bruising. Do not store a split tomato with intact fruit: use it promptly when still sound or discard it if mould appears. Record the first ripe-fruit date to refine local timing next season.
Can ‘San Marzano’ tomato be grown in a container?
Yes, but its indeterminate habit needs considerable space and very strong support. Choose a stable 30 to 40 L container at least 40 cm deep with several large holes. Fill it with rich, freely drained potting mix, then install a tall cage or anchored trellis before planting. Place the pot in full sun away from strong wind. Maintain consistent moisture; in hot weather, check the mix daily and water deeply as the surface begins to dry. Always empty the saucer. Once fruit forms, apply tomato fertilizer according to its label. Tie stems as they rise and keep leaves away from the potting mix. A large supported pot should not be moved frequently because its weight and trellis make handling unsafe. Harvest often to reduce weight on the stems.
Are San Marzano seeds organic and open-pollinated?
Yes. Tourne-Sol presents this packet of 50 seeds as organic and open-pollinated. To save seed, choose several evenly red, fully ripe, healthy, typical fruit from clearly labelled plants. Scoop seed and gel into a labelled container, allow brief fermentation, then rinse and dry seed completely. Tomatoes are mainly self-fertile, but occasional crossing remains possible; separate cultivars when varietal purity matters. Store fully dry seed in cool, dark conditions protected from humidity, with the cultivar name and harvest year clearly recorded. Also record the harvest date and SL321-a source. A paper envelope placed in a dry container maintains identification while avoiding residual moisture. Test a few seeds before the next sowing, and never combine seed from a diseased fruit with the saved lot.

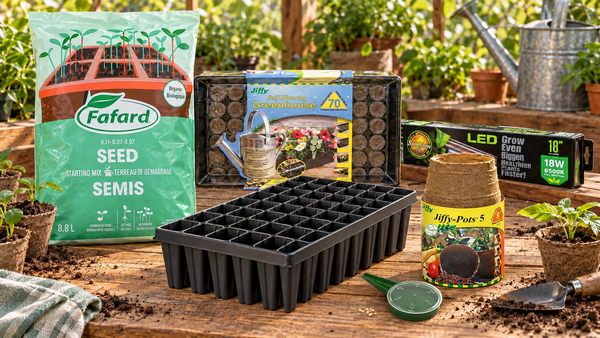
Seed-starting essentials

Click a product to build your selection.

Your selection

Total