Sale
Sold out

Non-organic seeds, Untreated seeds, coated seeds
Amaranthaceae
Root vegetables seeds
Untreated ‘Boltardy’ beet on tape (Beta vulgaris)
Product code : 69-0810-01N
This W.H. Perron Boltardy beet contains approximately 140 untreated seeds and produces a selection of deep red without rings round roots. Maturing in 60 days, it creates colourful harvests without requiring several packets. Beets prefer full sun, light loose soil, and consistent moisture. In Canada, they can be direct-sown from May to early July, then thinned so each root has room to develop. Tender young leaves are suitable for salads, while larger greens can be cooked like spinach. Roots harvested before they become oversized remain tender and work equally well roasted, pickled, or served fresh. It is a practical, attractive choice for beds and containers.
- Quantity
- Approximately 140 seeds on a 6-metre biodegradable tape
- Exposure
- Full sun
- Life cycle
- Annual
Discover the plant
Common nameUntreated ‘Boltardy’ beet on tape
FamilyAmaranthaceae
GenusBeta
Speciesvulgaris
CultivarBoltardy
TypeNon-organic seeds, Untreated seeds, coated seeds
Botanical nameBeta vulgaris
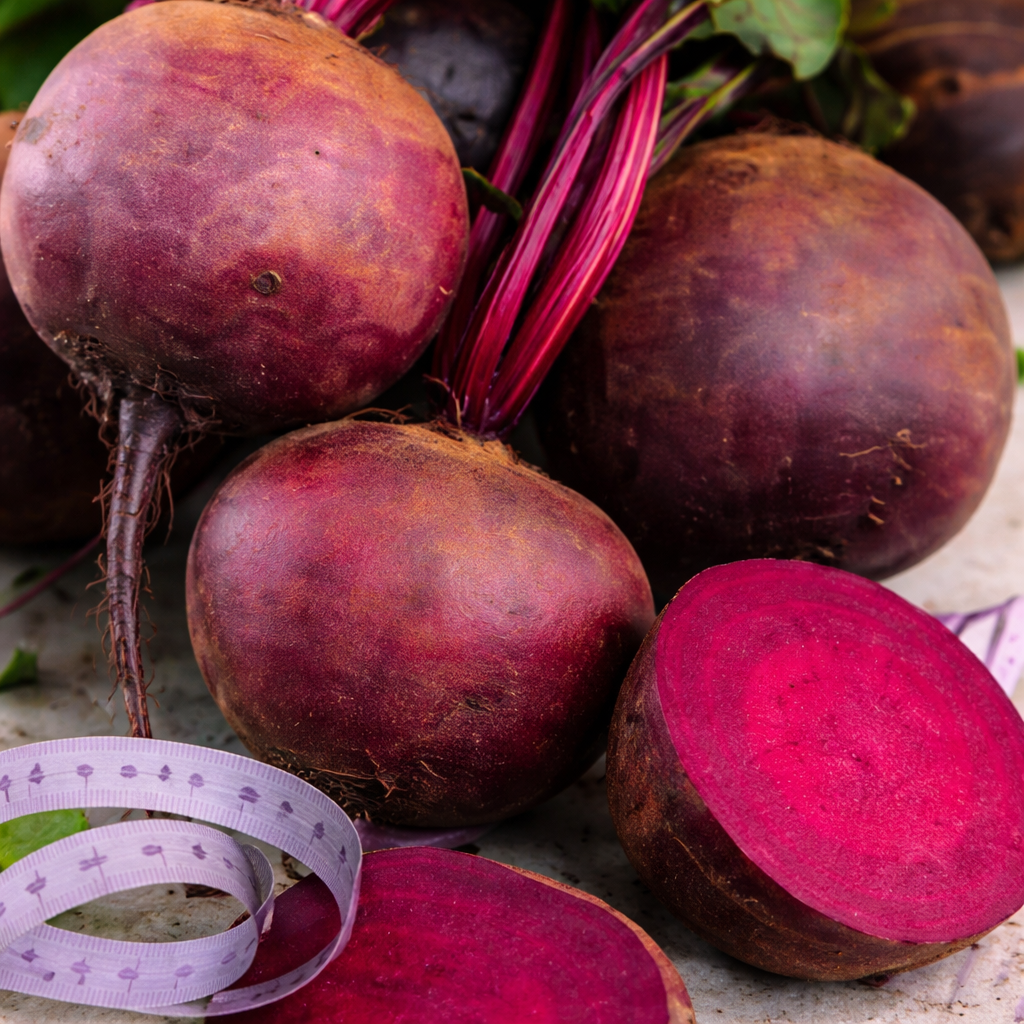
Untreated ‘Boltardy’ beet on tape (Beta vulgaris) produces globular roots with tender, sweet, deep-red flesh without rings. Its medium-green foliage may be harvested sparingly when young, while the round root suits fresh dishes, roasting, and pickling. Product 69-0810-01N contains approximately 140 untreated seeds distributed along a 6-metre biodegradable tape. It is not advertised as organic and carries no F1 hybrid designation on the official product page. Maturity is approximately 60 days after sowing. The pre-sown tape keeps seed density regular, reduces oversowing, and makes a straight, evenly populated row easier to establish without handling each beet seed cluster separately.
In full sun, prepare light, loose, slightly sandy, stone-free soil with a pH of 6.0 or higher. Open a shallow furrow, lay down the tape cut to the desired length, moisten it, then cover with a thin layer of soil corresponding to approximately 1 cm depth. Space rows 30 to 40 cm apart and keep soil moist through emergence. Regular seed placement normally reduces thinning, but preserve approximately 8 cm between plants wherever a section emerges too densely. Mature compost incorporated before sowing supports quick, steady, flavourful growth. Keep the tape flat against the soil so moisture reaches every segment consistently.
Avoid long droughts followed by heavy rain because these fluctuations may reduce colour and make roots tough or woody. Harvest beets as soon as they reach a useful diameter; they are tender at half size and harden when allowed to become oversized. Young leaves can be used in salads, while mature greens cook like spinach. To spread the harvest, install sections of tape every two weeks until late July. W.H. Perron lists garlic, artichoke, broccoli, chamomile, celery, cabbages, shallot, strawberry, bush bean, lettuce, onion, and radish among companions, and identifies several neighbours to keep away, including pole bean and potato. Cool roots promptly after lifting.

Sowing guide
It all startswith a seed.
Sowing depth
1 cm
Spacing / density
Thin to 8 cm; space rows 30 to 40 cm apart
Germination temperature
10 to 25°C
Germination time
5 to 12 days depending on temperature and moisture
Sowing period
Direct sow from May to early July; mid-June for a fall harvest
Propagation
Seed
Growing method
Loosen the garden soil to at least 20 to 25 cm and remove stones, hard clods, and debris that could distort the roots. Work in mature compost or thoroughly aged manure without overloading the bed with nitrogen. Beginning in May, make shallow furrows in full sun and place seeds 1 cm deep. Keep rows 30 to 40 cm apart. Maintain surface moisture until emergence, generally within one to two weeks depending on temperature. Beet “seeds” are commonly seed clusters that can produce more than one seedling, so thin carefully once the first true leaves appear, leaving one plant every 8 cm. Snip extras at soil level to avoid disturbing neighbouring roots. Water regularly throughout root development, especially when rainfall is limited. A light mulch applied after thinning helps stabilize moisture and suppress weeds. For an extended harvest, repeat a small sowing every two weeks until early July. Pull roots at half size for exceptional tenderness or allow them to reach the preferred diameter, but do not leave them until they become oversized and woody. If gaps remain after emergence, resow only the empty spaces instead of making the entire row too dense.
Soil and care
The right care,at the right time.
Soil pH
6.0 or higher
Minimum temperature
Tolerates cool temperatures; protect from hard frost
Care level
Easy
Watering
Keep the soil evenly moist from sowing through harvest without saturating it. Water deeply when the surface begins to dry, and monitor more often in containers or hot weather. A long dry spell followed by heavy rain may result in hard, woody, or less colourful roots; consistency matters more than occasional very heavy watering. Apply water to the soil rather than the foliage, and check moisture a few centimetres below the surface before watering again.
Soil type
Prepare light, loose, slightly sandy, well-drained soil with a pH of 6.0 or higher. Remove stones and break every clod so round roots develop without distortion. Incorporate mature compost or fully decomposed manure before sowing. Avoid fresh manure and compacted ground. Maintain consistent moisture without saturating the root zone because drought followed by heavy watering may reduce quality and colour. Keep foot traffic away from prepared rows so their structure remains loose through harvest.
Fertilization
Before sowing, incorporate a moderate layer of mature compost or fully decomposed manure. Already fertile soil needs little additional fertilizer. Avoid high-nitrogen feeding, which encourages abundant leaves at the expense of roots. If growth becomes pale, use a balanced vegetable fertilizer sparingly, then water to distribute the nutrients through the root zone. Never apply fresh manure immediately before sowing, because overly aggressive fertility may reduce root quality and interfere with even root formation. overall
Moisture
Consistent moisture without standing water
Seasonal care
In spring, wait until the soil can be worked, then loosen it, remove stones, and incorporate mature compost. Sow beginning in May and keep furrows moist until emergence. Thin promptly to 8 cm once true leaves appear; clean, healthy thinnings may be used as young greens. Weed by hand or with a shallow hoe so developing roots are not injured. In summer, check moisture several times each week, especially in sandy soils and containers. Make succession sowings every two weeks until early July to avoid one large harvest. Monitor foliage and remove badly damaged leaves while retaining enough leaf area to feed the roots. Harvest progressively as beets reach the desired size. In fall, lift the final roots before a deep freeze; trim tops while leaving a short stem if the roots will be stored, then keep clean, uninjured beets in cool conditions. During winter, empty and clean containers, record which colours were preferred, and plan crop rotation. Avoid planting beets or closely related crops in exactly the same spot immediately the following season. Inspect plants regularly after rainy periods and keep rows open to airflow through the recommended spacing. Discard diseased debris instead of composting it. Once roots are in storage, check them periodically and remove any that soften so the remainder of the harvest keeps well. throughout storage
Container growing
A garden,within reach.
Recommended pot size
Drained container, leaving a spread of approximately 20 to 30 cm (8 to 12 in) for the plant.
In summer, check the moisture several times a week, especially in sandy soils and containers. In winter, empty and clean containers, note the most popular colors, and plan a rotation: avoid replanting beets or other chenopods in the same spot immediately. Water deeply when the surface begins to dry and increase monitoring in containers or during hot periods. In an urban garden, a large planter in the sun allows for productive cultivation near the kitchen. The foliage of this variety occupies about 20 to 30 cm (8 to 12 in); leave this width available around the container instead of crowding several plants against its edge. Place the container of this variety in the following exposure: full sun, checking the light received throughout the day. Emergence generally takes 5 to 12 days depending on temperature and humidity in a potting mix maintained at 10 to 25 °C. The sowing schedule for this variety is as follows: direct sowing from May to early July; mid-June for an autumn harvest. For this variety, observe the following sowing depth: 1 cm.

Bloom and dimensions
Its place,in your garden.
Mature height
About 25 to 40 cm (10 to 16 in.) with foliage
Width / spread
Approximately 20 to 30 cm (8 to 12 in)
Flower color
Greenish
Foliage color
Medium green
Foliage type
Rosette of broad leaves with coloured petioles
Growth rate
Fast
Growth habit
Compact rosette above a round root
Bloom period
Harvest before bolting; flowering normally occurs in the second year after a cold period. Beets are botanically biennial but are grown as annuals for their roots and leaves. Prolonged exposure to cold can sometimes encourage premature bolting. Remove plants that develop a flower stalk, because their roots quickly lose tenderness and culinary quality once reproductive growth begins. and flavour at harvest time
Fruiting
'Boltardy' Beetroot on tape (Beta vulgaris) produces globular roots with sweet, tender, deep red flesh and no rings. Its medium-green foliage can be harvested sparingly when young, while the round root is suitable for fresh, roasted, or pickled dishes. Avoid long dry spells followed by heavy rain, as these variations can reduce color and make the roots tough or woody.
Days to maturity
Approximately 60 days after sowing
Harvest
Round deep-red ringless root and young leaves; approximately 60 days after sowing
Garden associations
In goodcompany.
Companion plants
Garlic and cabbage according to W.H. Perron. Use this guidance when arranging rows while preserving enough space and sun for every crop. Companion planting does not replace rotation, well-prepared soil, or regular observation. Prevent tall vegetables from shading young beets or several root systems from crowding a narrow area. Keep easy access for thinning, watering, airflow, and inspection of every developing root. Rotate vegetable families between seasons, remove diseased debris promptly, and keep the beet row free of weeds that compete for moisture. Keep all companion plants far enough away that beet roots still receive full light, steady moisture, and room for harvest.
Recipe idea
From the gardento your plate.
Edible parts
Roots and leaves
Prepare refrigerator-pickled Boltardy beet slices. Harvest six firm roots, remove tops, wash, and cook whole until a knife passes through easily. Cool slightly, peel, then cut into even rounds using their round form. Bring 250 ml vinegar, 250 ml water, two tablespoons sugar, one teaspoon salt, and several peppercorns to a simmer. Place slices in a clean heat-resistant container, pour over the hot brine, cool, and refrigerate. Wait at least twenty-four hours before serving. This is a refrigerated pickle, not a shelf-stable canned product. Use a tested process and validated processing times for any shelf-stable canning. Label with the date, keep continuously chilled, and discard the contents if mould, unusual gas, or an abnormal odour appears. Serve the slices with sandwiches, grain bowls, or salads and return leftovers promptly to the refrigerator. For the clearest presentation, arrange slices by diameter and serve chilled. Use clean utensils each time the container is opened, keep every slice beneath the brine, and consume within the refrigerator-storage period recommended for the chosen recipe.
Frequently asked questions
Your questions,answered.
When should this beet cultivar be sown in Canada?
Direct-sow beginning in May once the soil can be worked, and continue through early July. W.H. Perron also suggests a mid-June sowing for a fall harvest. To prevent all roots from maturing at once, sow a short row every two weeks. Place seeds 1 cm deep and keep the soil moist until emergence. Beets appreciate cool conditions and uninterrupted growth. Protect very early seedlings from hard frost and do not wait for peak summer heat to begin, since drought and large moisture swings can toughen the roots. A light mulch after thinning helps maintain the even conditions that produce the best texture.
How many seeds are in the packet, and are they untreated?
W.H. Perron product 69-0810-01N contains approximately 140 seeds on 6 metres of biodegradable tape. The official formulation is untreated, and the product is not advertised as organic. Seeds are positioned at optimal density between two very thin layers of biodegradable fibre; this is a pre-spaced sowing support, not a coating individually applied to each seed. Cut only the length required, lay the tape flat approximately 1 cm deep, moisten it, and cover it thinly. Store the unused portion in cool, dry conditions. Keep the package and verify its code before sowing because every W.H. Perron tape reference has its own seed quantity. Retain the original label with your garden notes.
Why can several seedlings emerge from one spot?
What is commonly called one beet seed is often a seed cluster that may contain more than one embryo. It is therefore normal to see two or more seedlings emerge very close together. Wait until the first true leaves appear, then thin to keep the strongest plant every 8 cm. Snip the others at soil level instead of pulling sharply, which could disturb the root being retained. Removed young greens may be eaten if they are healthy and clean. Proper thinning reduces competition for water, light, and nutrients and gives each beet enough room to form a round, even root rather than remaining small or becoming misshapen.
How can hard or woody roots be prevented?
Encourage fast, uninterrupted growth. Prepare light, loose, stone-free soil and maintain consistent moisture from sowing until harvest. A long drought followed by heavy rain stresses the crop and may produce tougher roots with poorer colour. Water deeply when the surface dries and apply a light mulch after thinning. Keep the recommended 8 cm spacing to reduce competition. Harvest when roots reach the preferred diameter rather than allowing them to become oversized. Beets are especially tender at about half their mature size. Also avoid excessive nitrogen, which promotes abundant foliage without improving root quality. Regular care is more effective than trying to correct severe dryness with one very heavy watering.
Can this cultivar be grown in a container?
Yes. Use a planter at least 25 to 30 cm deep and preferably holding 30 L or more, with several drainage holes. Fill it with loose vegetable potting cultivar enriched with compost. Sow 1 cm deep, place the container in full sun, and thin seedlings to 8 cm apart. Because potting cultivar dries faster than garden soil, check moisture daily during hot weather. Water until excess drains, then empty the saucer. A thin mulch slows evaporation. Harvest progressively to release space for neighbouring roots, and avoid shallow pots that restrict round root development. A large container also makes it easier to stagger two sowings and extend the harvest.
For a great start to your seeds
The right extras.Right here.
Seed Starting Soil
Shop the collectionSeed starting supplies
Shop the collection