Sale
Sold out

Organic seeds; no coating or other treatment stated
Brassicaceae
Organic seed for microgreens
Organic cultivated arugula for microgreens
Eruca sativa
Product code : 65-9508-01B
Organic W.H. Perron cultivated arugula produces green microgreens with a pungent, peppery, slightly bitter flavour in 5 to 14 days. The packet contains 50 g of small organic mucilaginous seed. Do not presoak or rinse it daily; spread it directly over an already moist clean medium. Mist gently or water from below so the gelatinous layer is not displaced. Provide bright indirect light after emergence, maintain gentle airflow, and harvest at the open-cotyledon stage with clean scissors. Dry shoots carefully and refrigerate them promptly in a clean container. Daily observation allows moisture to be adjusted without disturbing the seed layer.
- Quantity
- 50 g of seeds per packet
- Exposure
- Initial darkness, then bright indirect light
- Life cycle
- Annual species grown as a short indoor crop
Discover the plant
Common nameOrganic cultivated arugula for microgreens
FamilyBrassicaceae
GenusEruca
Speciessativa
CultivarCultivated arugula
TypeOrganic seeds; no coating or other treatment stated
Botanical nameEruca sativa
Reproducible seedsYes
Organic cultivated arugula for microgreens (Eruca sativa) quickly produces fine green young shoots with the slightly bitter, pungent, peppery flavour associated with mature arugula. The W.H. Perron 65-9508-01B packet contains 50 g of organic seed. Seeds are small, round to oval, and range through warm reddish-brown to dark-brown tones. The supplier presents these microgreens as a source of iron and vitamins A and C. They brighten salads, raw vegetables, soups, and cooked dishes without requiring a large growing area. Their assertive flavour means a small harvest can noticeably season a meal.
Arugula seed is mucilaginous: contact with water releases a gelatinous coating. Do not presoak it and do not rinse it daily. Spread seed directly in one thin, even layer over an already moistened clean medium or a suitable germination dish. Press gently to ensure contact without burying seed. Mist lightly at first or water from below so the layer is not displaced. Maintain even moisture without standing water, then provide bright indirect light and gentle airflow once shoots emerge. Keep trays level so water and seed remain evenly distributed. Label each tray with its sowing date.
Harvest generally after 5 to 14 days depending on temperature, light, density, medium, and the preferred stage. Cut stems just above the medium while cotyledons are open, green, and still tender. The official yield is approximately 10 to 1 by weight, although results vary. Use clean scissors, avoid collecting medium, and dry the harvest carefully before refrigerating it in a clean container. A gelatinous coating around wet seed is normal; however, an unusual odour, persistent sliminess, or visible contamination means the batch should be discarded. Consume clean, dry microgreens promptly for the best texture.

Sowing guide
It all startswith a seed.
Sowing depth
On the surface without burying
Spacing / density
Thin, even layer over moist medium
Germination temperature
Moderate, stable indoor temperature
Germination time
Rapid emergence without presoaking
Sowing period
Year-round indoors
Propagation
Direct sowing of mucilaginous seed
Growing method
Clean the tray, medium, mister, scissors, and work surface. Moisten a food-safe growing medium evenly, then drain all excess water. Spread small arugula seed directly in one thin, regular layer; do not presoak because it is mucilaginous. Press only with a clean palm or tool to establish contact, without adding weight and without burying seed. Mist very lightly at first or add water to the lower tray so the gel forming around seed is not displaced. Maintain stable moisture without puddles and provide gentle airflow. Once shoots emerge, place them under bright indirect light and rotate the tray when needed. Do not rinse daily. Harvest after 5 to 14 days at the open-cotyledon stage, cutting just above the medium with sanitized scissors. Dry shoots and refrigerate promptly. Discard the batch if unusual odour or visible contamination develops. Daily observation allows moisture to be adjusted without disturbing the seed layer. Record the sowing date, clean equipment between batches, and keep the dry harvest refrigerated. A thin layer and gentle airflow support more uniform growth. Daily observation allows moisture to be adjusted without disturbing the seed layer. Record the sowing date, clean equipment between batches, and keep the dry harvest refrigerated.
Soil and care
The right care,at the right time.
Soil pH
Potable water; clean neutral medium
Minimum temperature
Protect from cold and sudden temperature changes
Care level
Moderate
Watering
Moisten the medium before sowing, then mist very gently when needed or water from below. Arugula is mucilaginous: its gelatinous coating retains water, and seed should neither be presoaked nor rinsed daily. Maintain even moisture without puddles, remove excess water from the lower tray, and provide gentle airflow so the surface does not remain waterlogged. Daily observation allows moisture to be adjusted without disturbing the seed layer.
Soil type
Use a clean, light, even, well-drained medium intended for indoor food production. Moisten it without soaking, distribute seed evenly, and prevent standing water around roots. A suitable microgreen mat or fresh, fine potting medium works well. The container should be washable, stable, and equipped with effective drainage to support uniform emergence, healthy early growth, clean handling, and reliable harvest quality.
Moisture
Moist with complete drainage
Seasonal care
Arugula microgreens grow indoors year-round, but drying speed changes with the season. In winter, keep trays away from cold glass and provide consistent bright indirect light. During spring and fall, watch temperature swings and reduce watering if the medium remains moist longer. In summer, protect fine stems from direct sun and excessive heat while gently increasing airflow. For every new batch, clean and sanitize the tray, lower reservoir, mister, and scissors. Moisten the medium before sowing mucilaginous seed without presoaking. Record sowing and harvest dates to compare the actual cycle with the 5-to-14-day window. Water from below or mist sparingly, then remove all excess water. Stagger small quantities so every harvest can be consumed promptly. After cutting, remove roots and medium, wash the area, and let equipment dry completely. In every season, observe odour, colour, and moisture daily, then refrigerate clean, dry shoots immediately. Daily observation allows moisture to be adjusted without disturbing the seed layer. Record the sowing date, clean equipment between batches, and keep the dry harvest refrigerated. A thin layer and gentle airflow support more uniform growth. Daily observation allows moisture to be adjusted without disturbing the seed layer. Record the sowing date, clean equipment between batches, and keep the dry harvest refrigerated. A thin layer and gentle airflow support more uniform growth. Daily observation allows moisture to be adjusted without disturbing the seed layer.
Container growing
A garden,within reach.
Recommended pot size
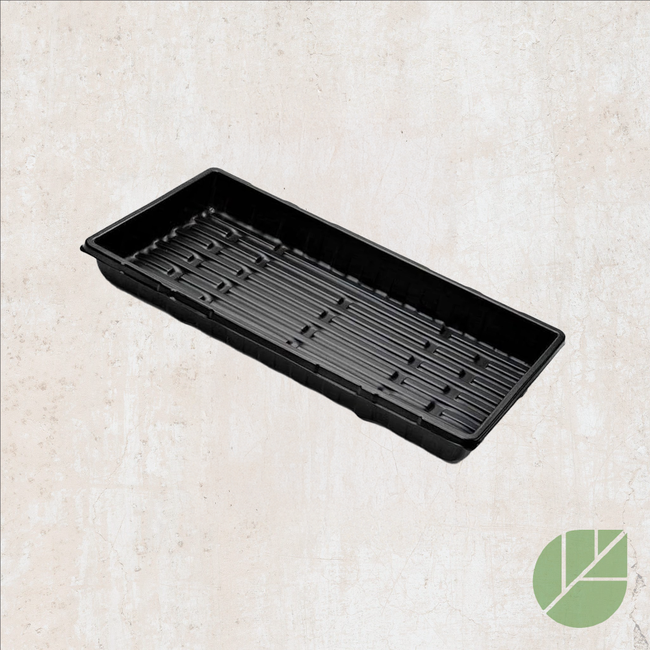
Shallow draining tray with a watertight lower tray
Use a shallow tray with drainage holes inside a watertight lower reservoir. Choose a clean medium suitable for food crops. Moisten it before sowing, then spread arugula in one thin, even layer over the surface. Mucilaginous seed should not be presoaked; it forms a gel upon contact with water. Press gently for contact without burying seed or adding weight. At first, mist finely if the surface dries while avoiding seed displacement. Once roots establish, favour bottom watering: add a small amount to the lower reservoir, allow the medium to absorb it, then remove the excess. Place the tray under bright indirect light and rotate it if stems lean. Harvest at the open-cotyledon stage by cutting above the medium. After cutting, remove debris, wash and sanitize both trays, and let them dry completely before another batch. Daily observation allows moisture to be adjusted without disturbing the seed layer. Record the sowing date, clean equipment between batches, and keep the dry harvest refrigerated. A thin layer and gentle airflow support more uniform growth. Daily observation allows moisture to be adjusted without disturbing the seed layer. Record the sowing date, clean equipment between batches, and keep the dry harvest refrigerated.

Bloom and dimensions
Its place,in your garden.
Flower color
Not observed at the harvest stage
Foliage color
Fresh green after exposure to light
Foliage type
Fine, tender cotyledons
Growth rate
Very fast; harvest is generally possible in 5 to 14 days
Growth habit
Dense mat of upright young shoots
Fragrance
Pungent, peppery, slightly bitter flavour
Bloom period
Harvested before flowering
Days to maturity
5 to 14 days for microgreens
Harvest
5 to 14 days, when cotyledons are open, green, and still tender
Recipe idea
From the gardento your plate.
Edible parts
Stems and young leaves harvested at the microgreen stage
Prepare a crisp bowl for two with cooled quinoa or rice, diced cucumber, shredded carrot, chickpeas, and a handful of thoroughly dried arugula microgreens. Add tomatoes, a cooked egg, or a mild cheese if desired. Whisk a dressing with lemon juice, olive oil, a small amount of mild mustard, salt, and pepper. Add it only at serving time to preserve the tender, crisp texture of the young shoots. Because their peppery flavour is pronounced, add them gradually. Cut the harvest with clean scissors, remove any growing-medium debris, and dry it carefully before use. For a sandwich variation, fold the microgreens into lemony soft cheese and serve with cucumber slices on whole-grain bread. Always use a fresh harvest that was refrigerated promptly and shows no unusual odour, sliminess, or growth. Wash vegetables, hands, and utensils, then return perishable ingredients to refrigeration promptly. Never consume any portion of a suspicious batch. Serve immediately after dressing so the arugula shoots retain their fresh colour, peppery flavour, and crisp texture.
Frequently asked questions
Your questions,answered.
How much does the packet contain, and is it organic?
Packet 65-9508-01B contains 50 g of organic seed. W.H. Perron also offers larger formats, but this product page specifically corresponds to the 50 g packet sold for home growing. No coating or other treatment is stated. Measure only enough seed to form a thin, even layer because an overly thick layer retains more moisture and reduces airflow. Reseal the packet and store the remainder in a cool, dry, dark place. Write the sowing date on the tray so the 5-to-14-day harvest window can be followed. Always use potable water and a clean container to avoid contaminating a new batch. Keep the dry packet away from humidity and never return handled seed to it.
Should arugula seed be presoaked or rinsed?
No. W.H. Perron indicates that no presoaking and no daily rinsing are required. Arugula seed is mucilaginous and naturally forms a clear gel when wet. Moisten the medium before sowing, spread seed in a thin, even layer, then press gently without burying it. Mist very lightly at first or water from below so the seeds are not displaced. Remove excess water, avoid puddles, and maintain gentle airflow. Inspect the crop daily instead of adding water on a fixed schedule. The medium should remain moist but never saturated. If an unusual odour or cottony growth appears, discard the batch. Clean hands and tools before every adjustment to the tray.
When should arugula microgreens be harvested?
W.H. Perron gives a harvest window of 5 to 14 days. Cut when cotyledons are open, green, and still tender, before the young leaves become firmer. Temperature, lighting, density, moisture, and medium can change the pace, so use plant stage as well as the calendar. Use clean scissors and cut just above the medium to avoid collecting particles or roots. Remove visible debris, then dry the microgreens carefully before placing them in a clean container in the refrigerator. Harvest only the amount that can be eaten promptly. Do not taste a crop with an unusual odour, colour, texture, or growth. Wash hands before harvesting and refrigerate the dry crop without delay.
Is the gelatinous coating around seed normal?
Yes. Arugula is mucilaginous seed and naturally produces a clear gel when wet. Normal mucilage remains close to the seed, appears soon after moisture is added, and has no unusual odour. It helps retain moisture, which is why no presoaking or daily rinsing is required. Keep the seed layer thin, avoid puddles, and inspect the crop daily. An unpleasant smell, cottony growth, suspicious colour, or sliminess spreading well beyond the gel surrounding the seed indicates deterioration instead. When in doubt, do not taste the batch: discard it, clean and sanitize the tray, then restart with fresh seed and improved drainage. Inspect smell and appearance before every harvest.
How can an unsafe batch be recognized?
Discard the batch without tasting if it develops an unusual odour, becomes excessively slimy, shows cottony growth, changes colour in a concerning way, or develops soft, deteriorated areas. Clear gel close to wet seed is normal mucilage, but it should not be confused with sliminess accompanied by odour or an unusual appearance. Do not try to rinse or save part of a suspicious batch. Empty the tray completely, discard seed and medium, then clean and sanitize the container using a method suitable for its material. Let it dry before restarting with fresh seed, a thinner layer, potable water, better airflow, and more effective drainage. Record what went wrong before starting the replacement batch.
Wildlife and pets
Life,around your plants.
For a great start to your seeds
The right extras.Right here.
Seed Starting Soil
Shop the collectionSeed starting supplies
Shop the collection